
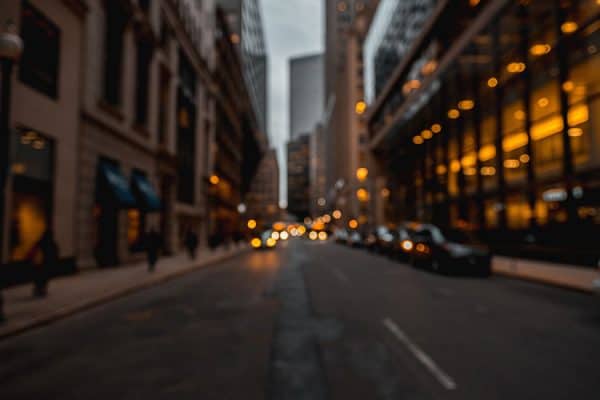
Nothing makes a picture pop like a sharp, clear subject against a creamy, blurred background. When I first started taking pictures, I was frustrated that my snapshots lacked that professional depth of field that makes them come alive.
So, how do you achieve a magical blurry background in your photos? The simple answer is in the speed of the aperture. Use a large aperture setting and your camera will focus on a single subject, throwing the background out of focus, adding dimension and depth to your photograph. A smaller aperture, by contrast, will flatten the image, keeping all subjects in focus.
Simple, right? But you, as the photographer, can shift the location of the blur, known as bokeh, to the foreground or the background. Or even somewhere in the middle.
Contents
Controlling the Blur
When composing the shot through your viewfinder, press the focus button halfway with the subject in the focus brackets. When using a wide aperture, other elements in your scene will fade away. Now shift your focus far away and push the shutter button halfway. You’ll see the closer elements nicely blurred, but the farther subject tac sharp.
Choose the Right Lens to Achieve the Best Blur
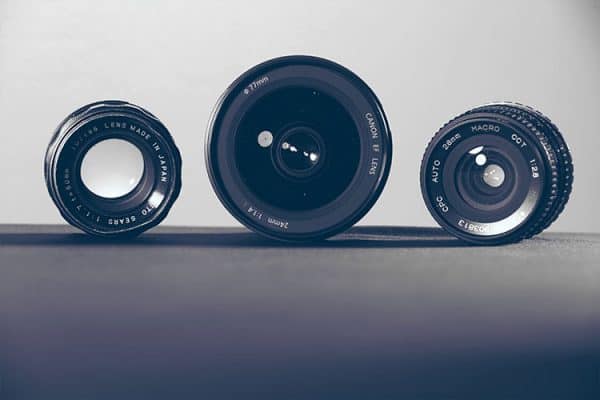
That beautiful blurry bokeh can only be achieved with the use of a fast aperture lens. The speed of a lens refers to how quickly it can expose a scene with fast shutter speed. Usually pricier than its slower counterparts, a fast lens has an aperture that opens wide to 2.8 or even 1.4. The distance you stand from your subject also has an effect on your bokeh. Even with a slower, smaller aperture, perhaps f/6.5, some level of blur can be achieved if you allow enough space between your subject and the background.
Understanding Aperture: Smaller Numbers Signify Faster, Larger Apertures
An aperture number is called an F-stop and is usually presented with a forward slash, such as f/2.8. Because these numbers represent a fraction, a larger F stop tells you that the lens has a smaller opening for light to pass through and hit your subject. That small, fractional aperture size, f/8 or f/11, tells you that most of your photograph will be in focus and it will also likely require a slower shutter speed to let in more light. A lens with a large aperture of say f/1.4 tells you that the opening is a larger slice of the pie, letting in plenty of light, and focusing only in the range you designate. Still confused? Play Backwards Land: the smaller the number, the bigger the hole!
The Quality of Your Bokeh
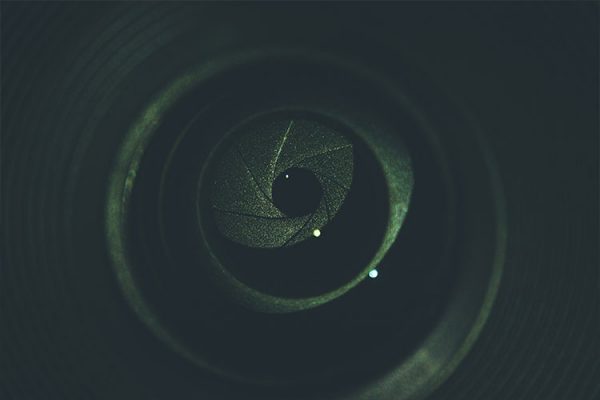
The size and shape of the aperture blades inside a lens can affect the size and shape of blurred pixels in your photograph. Aficionados of depth-of-field technique will argue for hours over the pleasantness or quality of a blurred background. Is it uniform? Can you perceive the outline of individual pixels? (hint: you shouldn’t see this.) Does the blurred area retain color, or does it look washed out? Are light and dark areas fairly uniform? Your choice of lens has a lot to do with this and, if you’re like many photographers, you’re going to read a lot of forums before making an investment. But how do I know which lens to buy?
Researching Your Ideal Bokeh Lens

When I first started researching lenses, I admit I spent a lot of time… A LOT of time… on Amazon. I wanted the opinions of not just professionals, but amateurs who struggled with the same concepts and learning curve that I was dealing with. But, most of all, I wanted to see their test shots. If you look up a lens on Amazon and scroll to customer reviews, these enthusiasts will not only detail the pros and cons from their own experience, but they will often include photos that back up their post. You’ll find plenty of information to get you started and you can even ask questions that other users will be happy to answer. When you’ve had enough pixel-peeping at others’ work, it’s time to consult the big guys.
The Lens Gurus are Online!
Once you begin to understand what you’re after as a photographer, it’s time to move onto such sites as DP Review or Tom Hogan if you’re in the Nikon camp. The DP Review forum attracts professionals and amateurs alike with one thing in common: a love of photography. If you get them started on Bokeh, you’ll be following the thread and learning a university degree’s worth of information and skill for months to come. Like any online forum, you get one or two of those troll-types who make you feel stupid for asking the obvious. But don’t forget: everyone was a beginner at one time and for every troll, there are a dozen photographers who honestly want to share their knowledge with you.
Understand the Specifications
I’ve also gained a lot of product understanding by using versus sites like Imaging-Resource.com.
When comparing lenses for bokeh, you’ll want to pay close attention to the Aperture range. Remember, stick to lenses that have a fast, large aperture like 2.8, 1.8 or even 1.4. These can be fixed lenses that do not change focal-length or zoom lenses that pull back for a wide shot or focus in close with a twist or a pull of the barrel. (Just make sure that the aperture numbers can be maintained all the way out to the farthest reach, and don’t get smaller as the lens pulls in closer.)
So, Why Would Anyone Want a Slow, Dark Lens?

Well, I’m glad you asked. Lenses with a smaller aperture are great for landscape photography and group portraits where you want to make sure that all subjects, those closest to you and those farther away, remain in focus. Tripods come in handy for this type of lens because you may have to slow the shutter speed to let in enough light. But perhaps the best reason to buy a smaller aperture lens is the cost. Wide aperture, fast lenses are often twice as expensive as the same focal length in a smaller, slower lens. If cost is an issue, look into those rare models that is both fast and cheap like the Nikon 35mm 1.8 fixed lens. The quality and sharpness of this lens will always make you look professional and it can be yours for around $300. And don’t forget to check Adorama’s Camera Store’s online refurbished section!
I Bought a Fast Aperture Lens, Now What?
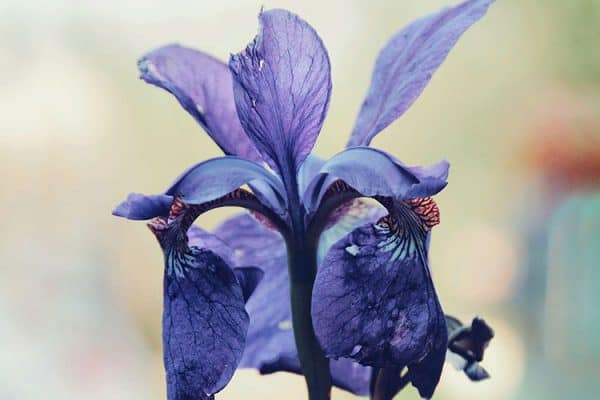
Here’s where the fun begins. Your camera will have an aperture dial, either manual, digital (in your menu), or both. Consult your camera’s body diagram to locate it. Choose an obvious subject with about five feet from the background. Flowers near a bright window makes a great test scene. Dial in the smallest aperture (the biggest number) your camera will allow on. Hint: you may need a flash or external lights source as you are making that hole in your lens tiny, reducing the light entering your sensor. Focus by pressing the shutter half way down. Once you see the petals are sharp, press the shutter the rest of the way down and take a photo. Now, return to your aperture dial and choose the largest aperture (the smallest number: 2.8, 1.4, etc) and repeat the process. When you compare the two photos on yourviewfinderr, you will see a darker image with the background in focus on the first one, and a lovely blur behind the flowers on the second, causing them to stand out in bright, professional, depth-of-field glory!
Related Questions

Is There Any Way to Achieve the Look of Bokeh without Using A Fast Lens? In the world of photography this is considered cheating, but… you could use an application such as Photoshop, Gimp, or OnOne to select the region of your photo you want blurred, create a layer, and add a gaussian blur. For a smaller blurred area, a brush tool can achieve this effect, but care must be taken to feather the edges around your sharp subject. Failure to feather will reveal the outline of your selection, exposing your post-production antics! Keep in mind it takes a great deal of skill and effort to make artificial bokeh believable in post-production.
What About Point and Shoot Cameras with Built-In, Compact Super Zooms? There are several very good automatic cameras on the market that allow you to manipulate aperture speed and size to achieve bokeh without ever changing a lens. Today’s modern fixed lens cameras have great resolution and plenty of reach and wide angle. Look into the Panasonic Lumix FZ series and the Nikon P900 point and shoot for wildlife, birding, and travel. You’ll sacrifice some sharpness, depth, and control, but you’ll save a whole lot of money.