
While no one wants to make mistakes when they start learning photography, they are bound to happen. Even the most experienced photographers sometimes need reminders about the most common photography mistakes and how to avoid them.
So what are the most common mistakes that photographers make? Photographers commonly make mistakes in the following areas: buying equipment, properly using their gear, composing photos with good lighting and technique, and post-processing photos. If you’re just starting out with your new camera or you’ve been taking photos for decades, it’s good to familiarize yourself with ways you might be using your camera or your lens incorrectly.
Here are the 33 Most Common Photography Mistakes (and How to Avoid Them)
Contents
Mistakes Buying Camera Equipment

The first area it’s easy to get tripped up is when buying camera gear. There’s an overwhelming amount of information available to help you purchase good quality cameras, lenses, and accessories. Yet hobby and professional photographers sometimes find themselves making these mistakes:
- Buying the most expensive equipment. One of the first rules you need to know when buying photography equipment is learning that quality is not equal to price. The most expensive cameras and lenses do not necessarily mean that they are the best cameras and lenses for you. When buying gear, you need to know exactly what type of photography you’ll be using it for. For example, if you don’t plan to shoot wildlife on a safari, there’s no reason to invest in an expensive super-telephoto lens.
- Buying brand new gear. Along with buying the most expensive equipment, it’s also a mistake to think you always need to buy brand new gear. Some of the world’s best photographers got their start with used camera equipment, purchased at a discount from a trusted retailer. Even if you decide to purchase a new camera body, consider refurbished lenses and used accessories to make your gear more affordable.
- Failing to budget. While you don’t necessarily need the most expensive camera gear, you do want to make sure you have the budget to spend on quality equipment. Failing to set a budget upfront (before you start shopping online or at the camera store) is a common mistake that can get beginners in trouble. Overspending on your camera gear will only take away from the time and enjoyment you have to spend on your new hobby.
- Assuming an expensive camera body is the only thing you’ll need. Some beginning camera enthusiasts get caught up in buying a state-of-the-art camera body, spending their entire budget on the camera body. Why is this a problem? Because the investment should be in your lenses too, not just the body. Spending hundreds of dollars on a camera body only to not have the right lens is not the best strategy.
- Not asking for advice.

 With hundreds of resources about buying camera equipment available now, there’s really no excuse for buying lousy gear. Ask for advice from a more experienced photographer, talk to your local camera dealer, and always read product reviews online before you make a gear purchase.
Mistakes Using Your Camera Body
The next place we often see beginning photographers making mistakes is with the camera itself. Not using your camera body properly can dramatically impact the quality of your images. Learn these tips and you can be sure to shoot just like the pros.
- Not reading the user manual.
 It’s hard to include this one on the list since we know that for many people user manuals are equivalent to torture devices. But when it comes to your camera, you really should take the time to carefully read the user manual. Every camera is different and you could be missing out on features that could make a huge difference in the quality, speed, and success of your shoots.The best way to read a user manual is to set it up like a photography class for yourself. Read a few pages or a “chapter” in the manual. Then take a break to go out and try the camera technique out for yourself. Learn what happens when you use a particular feature, and what happens if you don’t use it. Look at the photos you took and learn from them. Then go back to the camera manual and learn about the next feature.
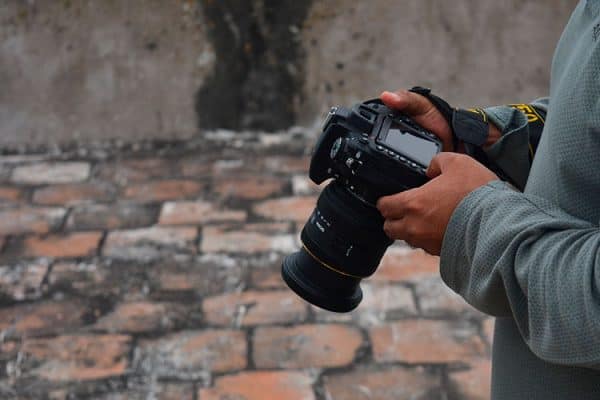
 - Holding your camera the wrong way. There’s nothing that makes a professional photographer cringe more than watching someone try to take a photo while holding their camera the wrong way. If you’re constantly seeing shaky focus and blur in your photos, more than likely you’re holding your camera wrong. Learning the proper posture will create more stability and will increase the sharpness of your photos.To hold a camera correctly, stand with your feet shoulder-distance apart and firmly planted. Place your left hand under the lens (not on the side of the lens). Spread your fingers apart wide, creating a flat ‘table’ to stabilize the lens. Then, with your right hand, hold the camera with enough pressure that it presses slightly against your forehead. Tuck your elbows in and keep your upper arms tight against your chest.
- Not spending time enough learning the features.
 As hinted above with not reading your camera manual, one of the worst mistakes you can make with your camera body is to buy a camera for the ‘bells and whistles’ and then never taking the time to learn how to use them. If you know your camera has features like white balance presets, custom image formats, metering modes, take the time to know how they work and how they impact your images.
 - Not having enough batteries or memory cards. It’s not your camera’s fault when you thought the battery was fully charged before you left for your kid’s soccer game, only to find it’s dead when you pull it out of the bag. Common beginner mistake is to not come prepared with enough battery power or memory space for the time you’ll be shooting. Don’t miss out on the key moments you want to capture because you don’t have a backup.
- Using too small of a tripod for your camera body.
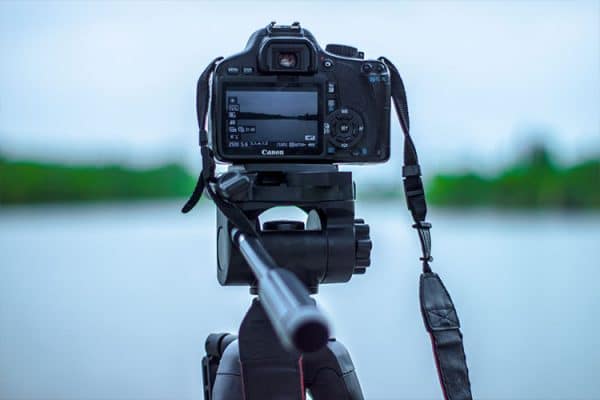 While this is more of a mistake with accessories, ultimately mistakes with tripods often come back to your camera body. Tripods are rated for specific weights, including the total weight of your camera body and your heaviest lens. If you purchase a tripod that can’t handle your camera body, it’s likely to tip over and put all your gear at risk. Make sure you’re using the right tripod and the right gear for your camera.
Common Mistakes With Camera Lenses
If you’ve mastered buying gear and the mistakes that happen with your camera body, the next area you should be focused on is lenses. The common mistakes beginning photographers make with camera lenses often have expensive consequences. Thankfully, their easy to avoid with some common-sense tips:
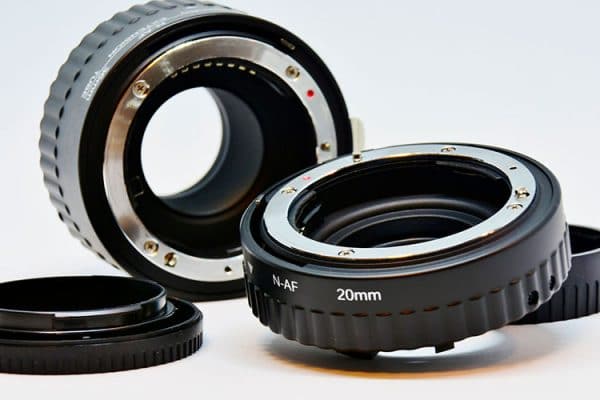
- Not paying attention to gravity and water. Dropping a lens and getting a lens wet are two of the most common (and expensive) mistakes to make with your camera lenses. Every single lens change should be done carefully and slowly. Use the same method every time to avoid dropping the lens. The same applies to shooting in wet conditions. Water creates havoc with lenses and should be avoided whenever possible. Avoid shooting in inclement weather or changing lenses on near bodies of water.
- Changing lenses outdoors or in the wind. Another mistake we see photographers make is changing lenses in situations where dust, sand, and debris can find its way into the lens or the camera sensor. As much as possible, avoid changing lenses outdoors or in windy conditions. Even small particulate material can cause issues with your images and how well your camera functions. If you have to change the lens outdoors, try to protect the camera as much as possible by standing behind a barrier or blocking the wind with your body.
- Using the wrong lens for the scene.
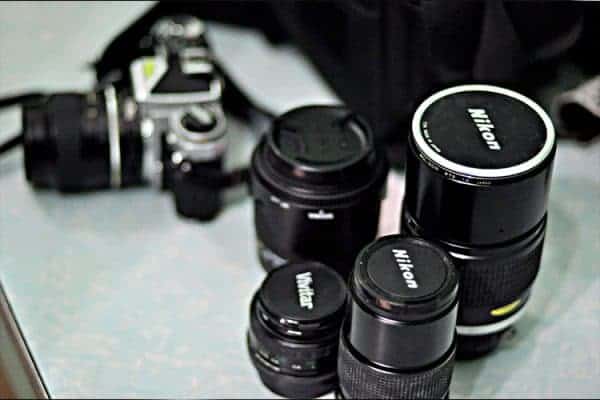 Different focal length lenses have different purposes. Beginner photographers commonly make the mistake of using the wrong focal length lens for the subject or scene. Learning the basic types of lenses (wide-angle, standard, telephoto, etc.) and their uses are important. So is learning the features of the lenses you own. Do some research online for the lenses you own or practice shooting the same still-life subject with different lenses and different focal lengths to learn what’s best for the types of photos you shoot.
 - Not having the lens in focus. Tack-sharp focus is something all photographers strive for. Failing to understand how to focus your lens, or how to focus it on the desired spot in your image is another common mistake beginning photographers make. Spend some time learning about how a camera lens or camera body focuses and then learn the ways you can tell if your particular image is in focus. Each camera has different tools to help photographers focus images properly. Be sure you know how they work for your individual model.
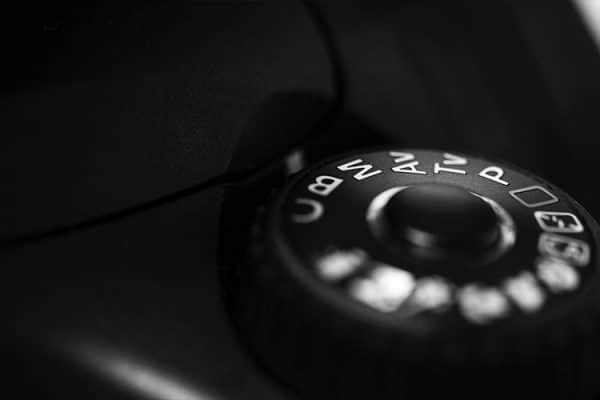
Mistakes With Your Camera’s Settings
Chances are if you’ve been taking photos for a while, you’re comfortable with the basic features of your camera. Yet without some careful attention to your camera’s settings, you’re at risk of making some of these common mistakes:
- Rushing without adjusting settings. While we completely understand that one time when your favorite celebrity was running past your front lawn, there was not enough time to check your ISO. But for the vast majority of situations, rushing to take a photo without thinking through your settings is a mistake. Even just pausing for a second or two is enough time to allow you to take stock of the lighting, your subject, and how you can adjust your camera settings to create the best image. Lighting and scenery can change quickly, so it’s also a mistake not to adjust settings frequently throughout a shoot. Don’t just “set it and forget it” and expect to have high-quality images every time.
- Always shooting in JPEG.
 One of the first things you probably heard when you bought your first DSLR camera was about the benefits of shooting in RAW format vs. JPEG. Despite the overwhelming recommendations for RAW format, it’s surprising how many people still always shoot in JPEG. RAW format allows you the most flexibility to alter images in post-processing. If you’re bothering to take a photo in the first place, why not give yourself the best chance of taking a gallery-quality image?
 - Setting the wrong white balance. Have you ever taken a photo and wondered why it turned out a funny blue or golden yellow color? Ever take a photo in a room with fluorescent lighting and wonder why the colors are slightly distorted? White balance is one of the first settings on your camera you should be aware of since it’s important to achieving the highest quality photos. If you make the mistake of setting the wrong white balance, it’s very difficult to correct in post-processing. You’re better off checking it each and every time you shoot to make sure what you see in the scene is the same as what’s captured by your camera.
Mistakes with Photo Composition
Of all the areas to make common mistakes in photography, mistakes with the composition of your photos can be the most damaging (and difficult to correct later on). Even if you understand and use all the technical settings on your camera properly, if your composition is lack-luster it will be obvious in your images. Knowing how to compose an image takes time, practice and attention to detail. When you learn the basic principles of good composition, then there are hundreds of ways you can not follow them and still take a good photo. Combine the tips below with good technical use of your camera and you’ll have everything you need to take images like a professional.
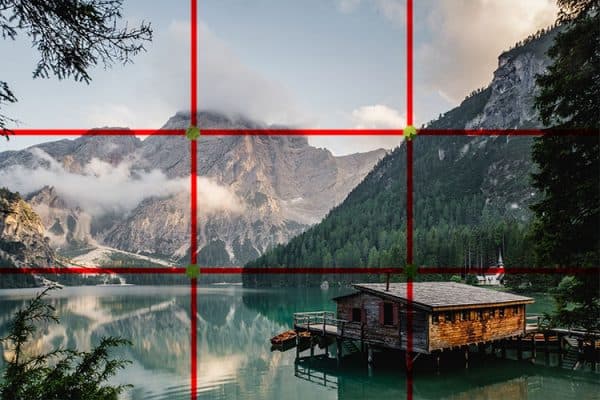
- Always centering subjects. Spend a few minutes in Google Images looking through professional photography and you’ll quickly notice that the subject is rarely centered in images. Unless you are capturing a specific type of portrait or street photography, the subjects in your photos should move about the frame. Understanding the Rule of Thirds, or one of the most common principles in composition is critical when placing your subject in the frame. Learn about it and then practice applying it to subjects in your frame.
- Not having a clear subject.
 Another common mistake beginners make is not having a clear subject for an image. Photography is a type of storytelling. Even landscape images should have a clear subject that helps convey a story you’re trying to tell. It’s important to isolate the particular part of a scene that’s most captivating to you, and then doing your best to capture that part of the scene in the best way. Anything else and you are likely to not convey a compelling message with your photos.
 - Cutting things off the edge of the frame. We’ve all been there. You’re excited about that terrific family photo of your grandma’s 90th birthday, only to find that because you were so focused getting the frosting on the cake in your photo, you chopped the top of grandma’s head out of the frame. While it’s good to have a clear subject and to convey a story, it’s also important to get all the features of your subject fully in the frame.To double-check this, as soon as you take an image, make it a habit to look at the LCD screen for the preview. Instead of first looking at the focal point of the image, quickly glance around all four edges. Is there something on the edge of the frame that shouldn’t be there? Good, then shoot again.
- The mysterious tilting horizon.
 While it’s possible to correct this in post-processing, another common mistake we see in composition is not taking the time to level out the horizon line. It’s especially important in situations like at the beach or landscape images where your eye is likely to follow a clearly defined horizon. We know that there’s no way the ground tilts quite like that, so hold your camera steady and get it level the first time.
 - Not looking behind the subject. Spend a few minutes in Google Images with a search for ‘bad photography backgrounds.’ You’ll see a whole stash of stop signs and lamp posts growing out of the top of subjects’ heads, dead trees in wedding photos, or worse—something completely inappropriate. The slang term ‘photobomb’ was born out of the mistake of not looking at what’s happening behind your subject when you take a photo. Always make sure there’s nothing in the background that will distract from the storytelling of the image you’re trying to take.
- Not changing viewpoints or angles.
 As you get more comfortable with your camera settings, you’ll also want to get more comfortable with shooting subjects in different ways. It’s a common habit (and mistake) to think all shots should be straight in front of the subject at eye level. But getting higher or lower than a subject can make a dramatic difference in the story that your images tell.To learn more about how viewpoint and angle can change an image, set up a still object on a table. Shoot from various angles (left, right, in front, above, below) and combinations. Put the images side-by-side and then notice what your eye is drawn to in the image. More than likely, the straight-on image won’t be your favorite angle to tell a subject’s story.
 - Not shooting in portrait (i.e., shooting only in landscape). For whatever reason, beginner photographers get in the habit of only shooting with their camera in landscape. Sometimes though, turning the camera to shoot in portrait is the best way to capture a scene. The opposite holds true for cell phone cameras, make sure that you’re varying it up and turning your cell phone sideways for photos.
Mistakes with Lighting
We’ve written here before that without lighting, there is no photo. Therefore, mistakes with lighting can cause big issues with the quality of your image. While post-processing has helped improve bad lighting, there are still some good tips to know so you’re not always relying on software to craft a good photo.
- Choosing the wrong lighting for the mood. Just as composition can help tell the story of a subject, the lighting in your image also goes a long way to capture the scene. Lighting especially influences mood and other’s perceive the subject. Imagine a child’s birthday celebration or family gathering with a festive atmosphere. Most likely the lighting your thoughts conjure is bright and airy. Deep shadows or bright overpowering flash can ruin the mood quickly if not carefully planned. The same applies to scenes where the story may require more dramatic lighting like street photography or fashion portraits. Make sure your lighting matches the mood as much as possible.
- Looking for the perfect location instead of the perfect lighting. Especially when shooting outdoors, it’s important to look at lighting first and then look at background. It’s a common mistake to lookout for a good background to take a portrait, only to have low lighting or a shadow in the wrong place on the subject. Check out your lighting conditions first and then decide how to optimize what’s behind the subject.
- Shooting with direct sun on the subject’s face.
 Some professional photographers cringe at the thought of shooting portraits in direct sunlight. Mid-day in full sun is one of the most difficult situations to take flattering portraits in, but so is any situation where there’s direct sun to deal with. In the same way that you don’t want shadows on a subject, you also should avoid shooting with direct sun on a subject’s face. It’s a common mistake that can make your subjects look washed out, with dark eyes or unflattering shadows. If possible, try to diffuse light or move to the shaded side of a building to shoot out of the sun.
 - Not creating catchlights in the eyes. When you advance to using studio and artificial lighting to enhance your photos, you’ll want to make sure to maximize all the features these tools can bring to your images. One of those features is catchlights and it’s a mistake not to use them in portraits. Catchlights, or those tiny reflections of light off the surface of your subject’s eye. The extra sparkle adds a lot of dimension and life to images. Make sure you understand how to create them using lighting tools and how to best capture them with your camera.
Mistakes With Cleaning Your Camera
We all know that it’s more fun to spend time taking photos than it is to spend time cleaning your camera gear. Yet not taking the time to maintain your gear in top condition, or using the wrong tools and strategies to clean your gear can be costly mistakes. Avoid making those mistakes by following these tips:
- Not cleaning your camera often enough. While every photographer is different, we often find that new camera owners do not clean their equipment often enough or do not understand when it’s necessary to clean their gear. You should clean gear whenever it’s needed, if you take your camera out several times per week, you may need to be cleaning it monthly. However, you may only take out your camera once per year but it’s to shoot an event at a dusty outdoor event, you may need to clean the camera right after the shoot. Other photographers that shoot primarily indoors and have very few lens changes may only need to clean their equipment once or twice per year. Every time you know the camera is exposed to dirt, dust, and debris that can impact the lens and camera sensor, it’s best to take the time to clean it.
- Cleaning your camera with the wrong tools. Another common mistake when cleaning a camera is to use the wrong tools. Unlike other electronics, some cleaning products like microfiber cloths and compressed air can actually cause more harm to your camera than good. If not used properly, pre-moistened or liquid cleaning products can also cause damage, eroding the special coatings on lenses and camera bodies. It’s best to ask a professional photographer to teach you how to clean your gear or do some research on the best cleaning tools for your particular camera body.
Mistakes With Editing & Storing Your Photos
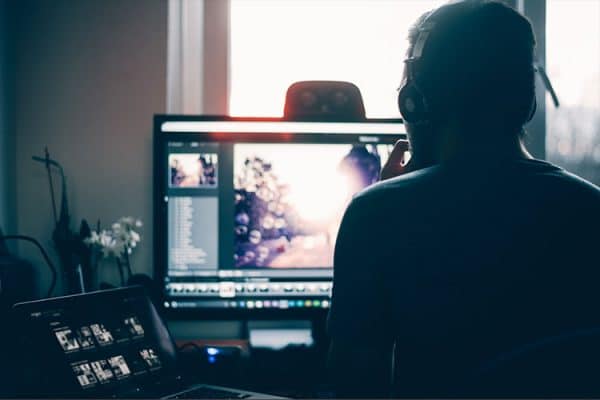
The final area of photography where both beginner and advanced camera owners can trip up is with storing and editing their photos. Once you take photos off your camera, it’s up to you to make sure you’re handling your images in the best way possible. Check out these common mistakes with post-processing:
- Not backing up your photos. In the era of cheap and affordable cloud storage, there’s really no excuse to ever find yourself with accidentally deleted images. Memory cards can be easily lost or damaged and shouldn’t be your only form of back-up. The same applies to only storing your photos in a folder on your desktop or laptop. Computers are easily stolen or damaged. Schedule regular backups and store your back up in a different location.
- Using cheap or basic editing software. While there’s no crime in using the entry-level photo software that comes standard with your computer, it’s a common mistake to think that this software can go the distance for your images. Free or cheap editing software rarely has the same benefits and features as professional editing software. It’s not necessary to spend your entire budget on a pricy pro software package, but if you want what’s best for your images it’s important to invest in good post-processing tools.
One Final Mistake
There’s one final mistake worth noting among all these other tips and that’s spending enough time taking photos. Whether photography is a serious hobby or just a way to capture your family’s vacation memories, the best photographers take lots of photos. And then they take some more.
The more you learn about your camera and what you enjoy about the images you take, the better your photos will be. It takes time to get to know your camera, your lenses, and to practice good composition techniques. The worst mistake any photographer can make is to not take photos at all.
Related Questions
What are the differences between technical photography skills and creative photography skills? How do you develop both?
Good photographers have a strong mix of technical skills (they know how to use a camera’s features) and creative skills (they know how to capture an image that tells a story). Photographers with good technical skills know and understand how camera equipment operates. They understand basic photography principles (e.g. lighting, exposure, focus) and know how to avoid common missteps like overexposure, camera shake, and blurry focus. Photographers with good creative skills know and understand the rules of composition (the Rule of Thirds, symmetry, simplification, etc.)
Often times beginning photographers will have either good technical or good creative skills but need work to develop both. A photographer with good creative skills that need some practice with the technical aspects of their camera will frequently make comments about how disappointing it is when the image they saw in the viewfinder doesn’t end up in captured in the final product. Likewise, photographers with good technical skills and underdeveloped creative skills feel like they are doing everything right, but don’t quite get the gallery-awe they are searching for.
In either scenario, the solution to develop good photography skills is exactly the same: systematic practice. To develop good technical skills, go through your camera manual and master the features of your camera step-by-step. Practice shooting with and without a particular feature of the camera. Look at the images and learn how each technical aspect of your camera changes the image.
To practice and develop creative skills, purchase a photography composition book and practice some creative exercises. Instead of focusing on f-stops and ISO, plan out practice sessions where you shoot from different angles or using techniques like the Rule of Thirds. Look at the images, then go back and shoot some more.
Practice. Practice. Practice. It’s the best way to develop good technical and creative photography skills.