Posts: 1,246
Threads: 27
Joined: Oct 2013
Reputation:
7
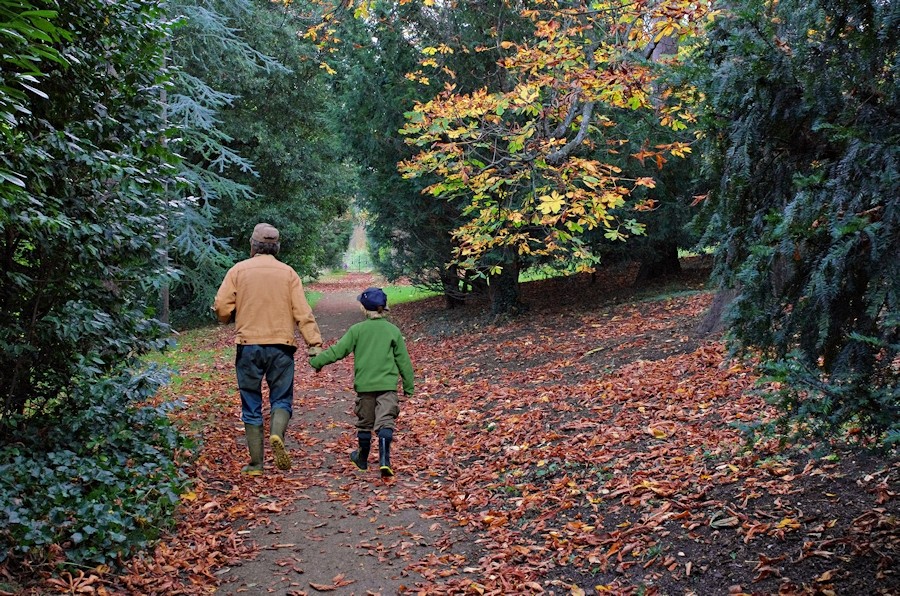
I quite like this photo of an autumn scene, shot in parkland in Buckinghamshire during this November (2013):

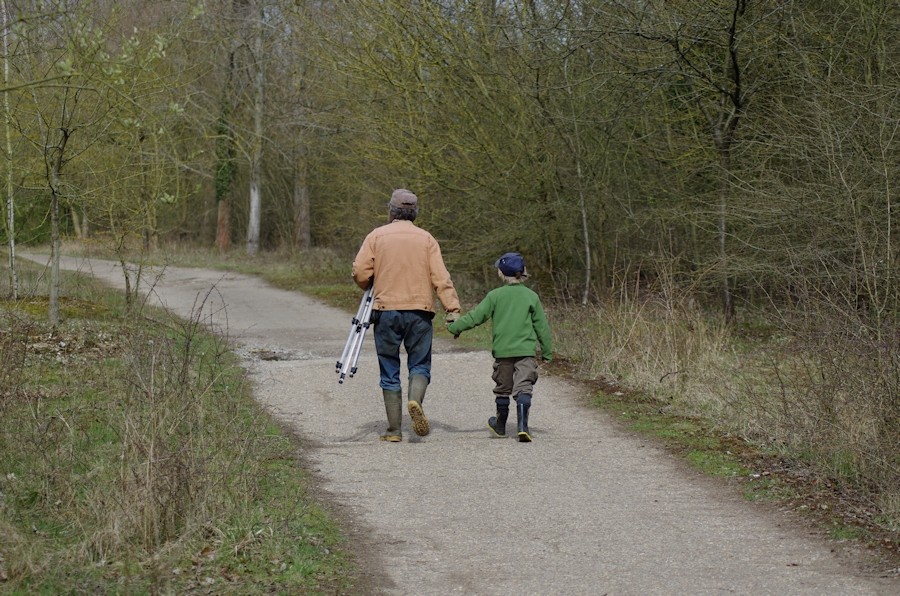
Then I remembered this one that I took back in April (2013), at a nature reserve in Hertfordshire:

As the boy and his dad were wearing the colours of an autumn scene, I thought it would be interesting to combine the images -
An Autumn Stroll With Dad:

No doubt some would regard this as a deception which is a post-processing step too far. However, the only motivation here was the desire to develop and practise skills and to make a better photograph.
Images recorded using a Pentax K-5 and processed in PaintShop Pro X4.
Philip
Posts: 642
Threads: 7
Joined: Nov 2013
Reputation:
4
(Dec 16, 2013, 04:11)MrB Wrote: Images recorded using a Pentax K-5 and processed in PaintShop Pro X4.
Philip
And let's be honest here Philip, done to a very high standard. It isn't my place to say it, but, well done, I'm impressed, photographic processing as it should be. Of course 'now' we're going to get EdMac raising the bar further!! 
Best regards.
Phil.
Posts: 474
Threads: 21
Joined: May 2013
Reputation:
2
Certainly makes the image stronger. But I think they are floating, just a little.
Posts: 1,948
Threads: 172
Joined: Sep 2012
Reputation:
4
Very nice! For those of us who are new to this kind of post processing, would you care to share in general how you accomplished this?
Barbara - Life is what you make of it!
Posts: 1,246
Threads: 27
Joined: Oct 2013
Reputation:
7
Thank you, Phil, Dean and Barbara.
Barbara, the general steps were something like this -
Starting with the 2nd image -
Slight adjustments to sharpness and lighting to make the man and boy a better match to the first image.
Select those two figures by drawing around them (PSP X4 has a "Smart Edge" tool to make this easier and more accurate), and then "Copy".
Then to the 1st image -
"Paste As New Selection" to put the figures onto the image, judging where their position should be by their size relative to the footpath, leaves and nearby trees.
Change the general colour balance to warmer tones, and then give an extra boost to the saturation of the autumn reds and yellows.
Increase the overall brightness and contrast, but darken the area under the man and boy - no sun so no detailed shadows to bother about.
Sharpen the whole image, using the simple default sharpening setting.
Resample the image for the web, maintaining the aspect ratio, down from 4928 to 900 pixels on the long side.
Final sharpening using the Unsharp Mask tool - radius=0.3, strength=100.
The adjustments I make during processing are usually gentle - i.e. small changes judged by eye, comparing the altered image with the original (I often have both on screen). If it needs more (or less) then I repeat the small adjustment. I know that a lot of this is a matter of subjective opinion, but I sometimes see images on the Web where parameters such as contrast, saturation, colour balance and particularly sharpness, have been modified too much to be realistic or pleasing to view, so I try not to go too far.
Philip
Posts: 9,325
Threads: 4,038
Joined: Sep 2004
Reputation:
5
I really like the ideas. You should feel no qualms about it. I agree that the figures seem to float in the background. Maybe it's lack of shadow.
Nikon D3100 with Tokina 28-70mm f3.5, (I like to use a Vivitar .43x aux on the 28-70mm Tokina), Nikkor 10.5 mm fisheye, Quanteray 70-300mm f4.5, ProOptic 500 mm f6.3 mirror lens. http://donschaefferphoto.blogspot.com/
Posts: 2,744
Threads: 100
Joined: Jul 2013
Reputation:
7
There is a line between Pics and Digital images. This, to me has not crossed it, a picture that could have been taken, as seen, looks like a well used path. Doubt if I would have realized it was composite, if not warned beforehand. Cloning some leaves strategically around the feet would help. Personally I would have added a bit more contrast/lightness, bring out a bit more detail, but, as Phillip says, his choice, and, Monitor calibration may come into this. A good pic. Approx how long to do this. Ed.
Posts: 1,246
Threads: 27
Joined: Oct 2013
Reputation:
7
Thank you Don and Ed.
(Dec 16, 2013, 15:51)EdMak Wrote: Approx how long to do this. Ed.
Probably not as long as it took me to type about it in my previous post!!! 
I would guess about 15-20 minutes, Ed.
Philip
Posts: 674
Threads: 75
Joined: Oct 2012
Reputation:
0
Wow! That's a really well edited photo, congrats!
The adjustments I make during processing are usually gentle - i.e. small changes judged by eye
That's my problem - I can't judge stuff by eye all that well yet. 
Posts: 1,246
Threads: 27
Joined: Oct 2013
Reputation:
7
(Dec 17, 2013, 02:16)kNox Wrote: Wow! That's a really well edited photo, congrats!
The adjustments I make during processing are usually gentle - i.e. small changes judged by eye
That's my problem - I can't judge stuff by eye all that well yet. 
Thank you, kNox.
My camera is a Pentax, so I went to Specsavers - they put Pentax lenses in all their spectacles, which must help! 
Philip
Posts: 181
Threads: 38
Joined: Oct 2013
Reputation:
1
All it needs now is a perspective shadow then the floating will make it appear grounded ..... well done!
Canon EOS 650D with 18-55 kit lens/ 75-300 zoom/ 100-400 zoom
https://www.flickr.com/photos/125137869@N08/
Posts: 2,744
Threads: 100
Joined: Jul 2013
Reputation:
7
The light does not indicate that shadows would be cast? Ed.
Posts: 223
Threads: 7
Joined: Aug 2013
Reputation:
2
(Dec 16, 2013, 06:23)Dean Wrote: Certainly makes the image stronger. But I think they are floating, just a little.
I looked at this for a while to figure out WHY they appear to be floating.
The man and boy are too sharp compared to the leaves on the path.
Valley of the Sun, Arizona
D2Xs, D200's, D100's, LightRoom, CS-CC
2HowardsPhoto.biz
Posts: 1,246
Threads: 27
Joined: Oct 2013
Reputation:
7
(Dec 26, 2013, 09:57)Wall-E Wrote: (Dec 16, 2013, 06:23)Dean Wrote: Certainly makes the image stronger. But I think they are floating, just a little.
I looked at this for a while to figure out WHY they appear to be floating.
The man and boy are too sharp compared to the leaves on the path.
I think you are right - thank you.
Philip
Possibly Related Threads…
Thread / Author
Replies
Views
Last Post
Users browsing this thread: 1 Guest(s)
|


