Posts: 2,356
Threads: 349
Joined: Jun 2004
Reputation:
0
I was playing with the Colour replacement tool, in order to cure "green eye" in dog pics, when I discovered that I couldnt introduce black.
No matter what the original colour, the new "black" is always grey. No other colour does this!
Here's an illustration:
This car is red, as you can see at the front. Vibrant colours work just fine as replacements, but black is grey. Anyone know why???? :/
![[Image: puzzled.jpg]](http://www.shuttertalk.com/forums/images/upload/puzzled.jpg)
Cave canem
Posts: 1,716
Threads: 125
Joined: Aug 2004
Reputation:
0
How are you setting the "black" replacement color?
_______________________________________
Everybody got to elevate from the norm!
Posts: 528
Threads: 67
Joined: Jul 2004
Reputation:
0
yeah, I couldn't get PS7 to replace with black either... Best I could get was to tint the grey areas black..... I'll post an example in sec
this is probably what you were trying to avoid by doing a replace, but here goes anyway...
so, polygon select the area you want black, desaturate.
Leaving the selection, create a new layer, fill=90%, trans=95% (adjust to taste after)
Fill selection with black.
Clear selection, gaussian blur the new layer by a pixel or less. Voila, black car. (note, this was done on my laptop without a mouse and in a hurry... the window tint is optional!)
![[Image: puzzled2.jpg]](http://www.shuttertalk.com/forums/images/upload/puzzled2.jpg)
The problem with black is that any change is luminosity moves it immediately and noticeably to grey. Real colours can chift in luminosity without being interpreted as a diff colour. As a result, to keep black really black, it comes off looking really flat and fake because there is so little variation in luminosity... I think.
<><
Camera: Panasonic Lumix FZ10
Image Management/Editing:ArcSoft PhotoBase4
Advanced Image Editing: Adobe PhotoShop 7
(This post was last modified: Mar 23, 2005, 22:58 by StudioJ.)
Posts: 9,731
Threads: 1,965
Joined: May 2004
Reputation:
6
Turn down the brightness on your monitor until the grey becomes black... 
Just kidding..
Posts: 1,199
Threads: 78
Joined: Aug 2004
Reputation:
0
I thought grey was the new black?
Posts: 3,620
Threads: 235
Joined: Aug 2004
Reputation:
0
I'm getting the impression that you are not using the tool properly.
Select the area to have the colour replaced
Go to image>adjustments>replace colour
Choose the eye dropper tool with the plus sign
Select all shades in the area selected
Adjust the fuzziness slider as needed. This adds pixels to the selection
Click the colour swatch and adjust to the desired colour.
adjust the sliders for hue, saturation and lightness as needed.
Be aware that adjusting the hue slider will change the colour. It's best left untouched.
Here is a crude example of your photo.
![[Image: 36_puzzled.jpg]](http://www.shuttertalk.com/forums/images/upload/36_puzzled.jpg)
Sit, stay, ok, hold it! Awww, no drooling! :O
My flickr images
Posts: 528
Threads: 67
Joined: Jul 2004
Reputation:
0
Cailean Wrote:(note, this was done on my laptop without a mouse and in a hurry... the window tint is optional!) Now that I see this on my CRT, all the detail is gone from my example -- I guess a little more transparency is needed to retain the detail.
btw, anyone know what the difference is between the 'fill' and 'trancparency' sliders on the layer control? They both seem to do the same thing to me....
<><
Camera: Panasonic Lumix FZ10
Image Management/Editing:ArcSoft PhotoBase4
Advanced Image Editing: Adobe PhotoShop 7
(This post was last modified: Mar 24, 2005, 09:41 by StudioJ.)
Posts: 2,356
Threads: 349
Joined: Jun 2004
Reputation:
0
No, sorry guys. This trick just eludes me, dunno why. :/
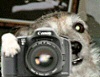
Here's a self-timer pic of me running for my supper.
Can you fix my eyes? They should be deep brown / black.
![[Image: Later-_0022.jpg]](http://www.shuttertalk.com/forums/images/upload/Later-_0022.jpg)
Free rice pudding picture for the best solution!
Cave canem
(This post was last modified: Mar 24, 2005, 10:28 by mustang67.)
Posts: 1,716
Threads: 125
Joined: Aug 2004
Reputation:
0
But you're so pretty with blue eyes!
![[Image: ruffus.jpg]](http://www.shuttertalk.com/forums/images/upload/ruffus.jpg)

_______________________________________
Everybody got to elevate from the norm!
Posts: 1,716
Threads: 125
Joined: Aug 2004
Reputation:
0
Cailean Wrote:btw, anyone know what the difference is between the 'fill' and 'trancparency' sliders on the layer control? They both seem to do the same thing to me....
I think you mean "opacity" not transparency.
Opacity affects the whole layer, including layer effects (bevels, drop shadow, etc.) while Fill affects the layer content but not layer effects. If you have no effects on a layer, then they will function the same.
_______________________________________
Everybody got to elevate from the norm!
Posts: 1,504
Threads: 182
Joined: Feb 2005
Reputation:
0
Hey Rufus,
Ok.. here's what I did (using Corel Photo-Paint this time, but the steps are the same as Photoshop).
Firstly, mask off the area you want:
![[Image: Step%201%20-%20Mask.jpg]](http://www.shuttertalk.com/forums/images/upload/Step%201%20-%20Mask.jpg)
Then, you can either paint using the colour replacement tool as you did earlier, or else for the case of wanting black or grey, you can "desaturate" the selection in one hit with the appropriate menu item.
![[Image: Step%202%20-%20Desaturate.jpg]](http://www.shuttertalk.com/forums/images/upload/Step%202%20-%20Desaturate.jpg)
That pretty much gets you where you were before, with a grey car. Now we need to edit the Curve of the selection to make the grey appear black. Instead of simply darkening the whole image, I try to retain the highlights so that specular highlights and bright reflections on the car will remain. Just as long as you bring that middle grey down a lot, it will start to look black. Below is the curve I used in this case, but it will probably vary from image to image - just fiddle until it looks OK.
![[Image: Step%203%20-%20Tone%20Curve.jpg]](http://www.shuttertalk.com/forums/images/upload/Step%203%20-%20Tone%20Curve.jpg)
And here is the finished product.... well.. at least the main part of the body looks kind of black. You can see that the front bumper (which was coming from a red, not a black) would need a march darker curve to make it look black.
![[Image: Step%204%20-%20Finished.jpg]](http://www.shuttertalk.com/forums/images/upload/Step%204%20-%20Finished.jpg)
Incidently, when you are using the "colour replacement" tool... It only replaces the Hue and Saturation of the image you swipe it over, it doesn't alter the luminescence (or lightness or "value") of the pixels. So it wouldn't matter if you went over it in white, grey, or black... as all these "colours" have no hue or saturation so the end result is the same. Try using the colour replacement tool with a dark red, and then with a light red of exactly the same hue and saturation. I think you'll find the end results come out identical as well.
Oh, and as for the photo of you with the alien eyes... well, instead of trying to darken them I thought "why fight it?" and went with the flow instead:
![[Image: WhyFightIt.jpg]](http://www.shuttertalk.com/forums/images/upload/WhyFightIt.jpg)
Edit: awww... after hitting "submit" I noticed that in the time I wrote this, Slej posted a much better picture with cloned eyes.... rats! good one slej! classic!
Seriously, I think green-eye reflections like those are beyond repair with a simple colour-replacing (and I did try, but nothing gave satisfactory results).
What I would suggest is taking some nice front-on photos of your (dogs) eyes in normal daylight with nicely diffused lighting. Maybe take a few from different angles, with different lighting. Then keep all these images stored away somewhere for later.
Then, whenever you take a photo suffering from green-eye like this, simply open the image with your "good eyes" in it and use the clone-brush to paint over the green with what the eyes look like in normal light. I think you'll end up with much better results.
Hope that helps!
Cheers
Adrian
Adrian Broughton
My Website: www.BroughtonPhoto.com.au
My Blog: blog.BroughtonPhoto.com.au
You can also visit me on Facebook!
"Everything should be made as simple as possible, but no simpler." - Einstein.
(This post was last modified: Mar 24, 2005, 11:55 by ISG.)
Posts: 2,356
Threads: 349
Joined: Jun 2004
Reputation:
0
Thank you folks. All a learning experience........ BUT...............................
:x :x :x :x
You remember, (some of you will), that I was a fan of Paintshop Pro, until Corel bought it? Well PSP would've fixed the eye problem at least, in 2 seconds. Remarkable really, as it cost about £60, where PSCS cost us much, much more.
Was it worth it??????????????????????
Cave canem
Posts: 1,504
Threads: 182
Joined: Feb 2005
Reputation:
0
Look at the beautiful eyelashes on slej's little effort rufus.. eyelashes like that make photoshop CS clearly worth it 
Any news on what Corel plan to do with PSP? I've been a big fan of Corel's Photo-Paint (dispite all their efforts to shoot themselves in the foot), and I fear that since they have now aquired PSP it will spell the end of Photo-Paint.
Perhaps they will combine the best elements of both and come out with a brilliant, stable, cheap (shareware) alternative to photoshop? hmmm, but with Corel running the show, I somehow doubt it :o/
Hey, wherabouts in the midlands are you? I lived in a little village just outside of Leicester for a year when I was a kid (like 20 years ago!).
Cheers
Adrian
Adrian Broughton
My Website: www.BroughtonPhoto.com.au
My Blog: blog.BroughtonPhoto.com.au
You can also visit me on Facebook!
"Everything should be made as simple as possible, but no simpler." - Einstein.
Posts: 2,356
Threads: 349
Joined: Jun 2004
Reputation:
0
I've heard nothing of PSP's future. PSP 9 was a bug ridden pig, but 8 was OK. Here's the pic after 20 seconds in PSP8
![[Image: Later-_0022copy.jpg]](http://www.shuttertalk.com/forums/images/upload/Later-_0022copy.jpg)
Ah. The answer to the other question, is South of Birmingham. It's about 40 miles from Leicester.
Cave canem
Posts: 2,356
Threads: 349
Joined: Jun 2004
Reputation:
0
Posts: 1,716
Threads: 125
Joined: Aug 2004
Reputation:
0
_______________________________________
Everybody got to elevate from the norm!
Posts: 3,620
Threads: 235
Joined: Aug 2004
Reputation:
0
Sit, stay, ok, hold it! Awww, no drooling! :O
My flickr images
Posts: 9,731
Threads: 1,965
Joined: May 2004
Reputation:
6
Lol... crazy eyed dog.. I think it needs to be put down!
Posts: 2,356
Threads: 349
Joined: Jun 2004
Reputation:
0
Cats eyes!!!!!!!!!!!
Nooooooooooooooooooo!!!!
Cave canem
Posts: 3,620
Threads: 235
Joined: Aug 2004
Reputation:
0
Rufus Wrote:Cats eyes!!!!!!!!!!!
Nooooooooooooooooooo!!!!
Sit, stay, ok, hold it! Awww, no drooling! :O
My flickr images
Users browsing this thread: 1 Guest(s)
|


![[Image: 35_Later-_0022.jpg]](http://www.shuttertalk.com/forums/images/upload/35_Later-_0022.jpg)