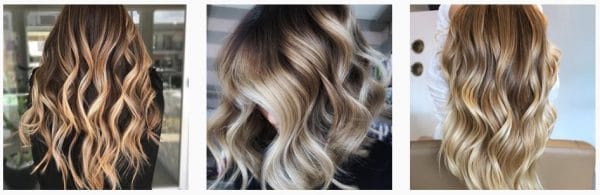
Whether you’re a salon hairstylist or a freelance photographer, you want to get great shots of hairstyles that will really make them pop. I see a lot of photos posted online where the person who took the photos, didn’t do the hairstyle justice. An amazing hairstyle photographed the wrong way can make it look average at best.
So, what’s the best way to photograph hair? Use a light source from above that shines down onto the subject’s hair. Let the hair take up the majority of the picture. Try to remove anything from the shot that may take someone’s focus off of the hair. Try to use a white or blackish background.
Contents
Light from Above
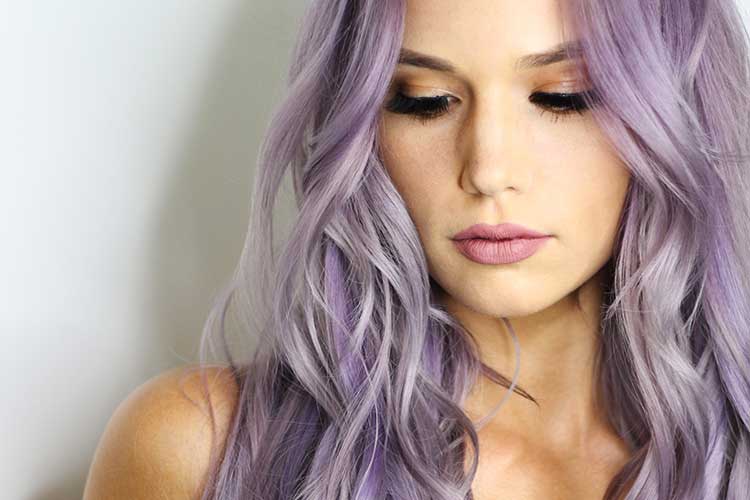
To make hairstyle photographs really look good, the most important thing is the lighting. Photographers use what’s called specular highlighting to really make hair look good. Specular highlighting just means that the light source you are using will create some sort of reflection from the object you are photographing. To set up your lighting, position it anywhere from 1ft-3ft higher than the hair of your subject and approximately 2ft-4ft away. You’ll want to play with the height and distance of your light source to achieve the perfect reflection off of the hair. The reflection from the hair is what really makes hairstyle photographs look great. If possible, use a light source that is slightly diffused. If you are a photographer, shooting in a studio setting, it’s a good idea to use a reflector from below the subject to even out any dark shadows that might show up on their face.
Here are some lighting suggestions:
Clip-On Light for Smartphones: https://www.amazon.com/QIAYA-Selfie-Camera-Photography-BatteryPowered/dp/B01NCW7FVU/
Ring Light for both SmartPhone and DSLR Camera users: https://www.amazon.com/Neewer-Ring-Light-Kit-Self-Portrait/dp/B01LXDNNBW/
Studio Lighting Kit: https://www.amazon.com/dp/B074CH687D
Less is More
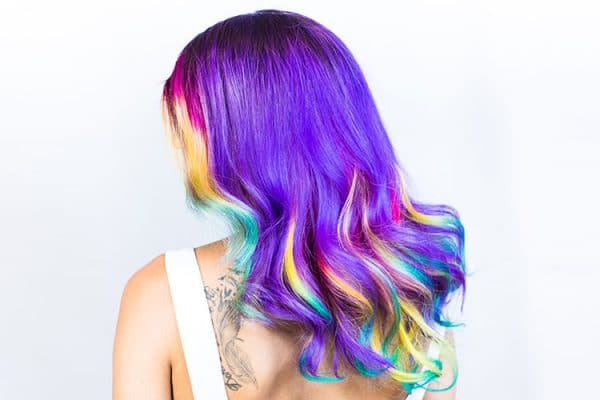
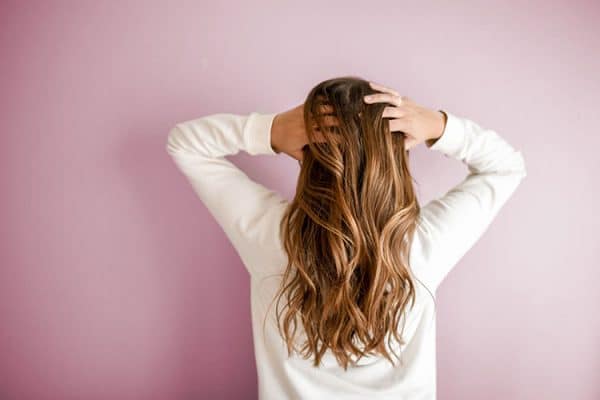
The second most important thing to remember when photographing hair is that less is more when it comes to your subject. Never try to add anything to the photo, but rather remove as much as you can. If you are taking a photograph of the back of someone’s head, then it’s pretty simple, as there won’t be much else to see. Just make sure there are no clips or bows showing unless that is what you are wanting to highlight. If you are taking a photo of the front of the person and their face is going to be in the shot, try to remove any earrings, nose rings, necklaces and any other jewelry that might make it in the shot. It’s also a good idea to have the subject close their eyes, otherwise, when someone views your photo, that’s where they will end up looking…right at the eyes. You can have your subject either close their eyes or look in another direction. Professional photographers take it a step further by removing any clothing from the shot, so all you see is bare shoulders and hair. This draws all of the attention to the hair.
Avoid Clutter in the Shot
Try to remove as much as possible around the subject, such as furniture, plants, art, etc. You can do this with the camera itself, by either getting closer to the subjects’ hair or zooming in (try to avoid zooming too much from camera phones), or you can physically move things out of the shot. Keeping these items out of the shot will put the focus on the hair instead of the other random things that are in the shot. Just like we talked about with “Less is More” above, be sure to make the hair the focal point and remove anything that can distract from that.
Shoot from Slightly Above
Shooting from the same height or slightly above your subject usually yields the best results. Try using a step stool to get your camera to a height that’s just slightly above your subject especially when shooting the back of the hair. Shooting down on the hair is going to make the light reflect off the hair better as well as pick up the shadows where you want them. When shooting the front of your subject, shooting the photo from the same height as them usually works well.
Take Several Shots
As with anything in photography, take multiple shots, because you never know which one is going to hit the sweet spot. Clicking a button on your phone or camera is the easy part, but doing all the hair prep and setup takes some time, so don’t rush things. Phone and SD card storage is cheap but your time isn’t. Try taking pictures from multiple angles, different heights and with the lighting in different spots. Your best bet though is to keep the light close to the subject and above them and shoot down onto the subject’s hair. Be sure to take a shot from the front, back and at roughly a 45-degree angle of their profile. It’s nice to have a range of angles to view the hair from. Be sure to have a sticky roller handy to get any loose hair off of the subject’s clothing before and during the shoot if necessary.
Dark Background vs Light Background
Hairstyle photographs tend to look best when using either a white background or something close to black. The white background will give your photos and airy and light feel, while a black background will have a more dramatic feel. If you are taking photos of customers for your salon, then a lighter or white background will work great. It’s ok to get some shots in your salon with the background being various parts of your salon, you just want to make sure that your focus is not on that. You can even take some shots in front of your salon to change things up a bit. The best time for outside shots is in the morning or late afternoon. Overcast days work well too, as the clouds create a soft light effect. Remember though that the specular highlight that you can get from controlled lighting is going to look the best. If you’re a doing a photo shoot for someone and really want to make the hairstyle pop like you see in fashion magazines, then opt for a blackish background. A black background will draw the eyes to a focal point on the hair where the light is hitting.
Here are some great collapsible double-sided backgrounds you can use: https://www.amazon.com/Fovitec-StudioPRO-Double-Sided-Collapsible-Background/dp/B00FG5DOV6
Portrait Mode on Smart Phones

If you are an iPhone user, you should have something called “Portrait Mode” on your phone. Android users can achieve similar results by selecting “Live Focus”. Try playing around with this along with your standard photo settings, to see if you can capture some really detailed shots. Portrait mode will focus in on your subject while giving the background a slight blur. This really helps the hairstyle stand out.
On the iPhone open your camera app and select Portrait Mode. The first thing you want to do it tap the screen on your subject’s hair. The camera will then tell you to get closer or further away from the hair. Once you are at the proper distance, try taping the screen on the hair again until the picture looks nice and clear and has the desired amount of lighting, then snap your photo.
On Android devices, launch your camera app and click on “Live Focus”. Tap the screen on the area where the hair is and then adjust the blur level with the slider that is near the bottom of the screen. You can then take a picture with either the shutter or the volume buttons. You can also adjust the blur after the picture is taken.
For Smart Phone Cameras – Stay Close Rather than Zooming in.
Smartphone cameras are somewhat limited when it comes to zoom, so be very careful. Some have an optical zoom as well as digital zoom, but others may only have digital zoom. You want to stay away from using digital zoom. Digital zoom on a smartphone camera is going to cause the picture to look grainy. Your best bet is to stay as close as you can to the hair while maintaining a good clear focus so that you don’t have to zoom in at all and are able to capture the entire hairstyle.
Recommended DSLR Camera Settings
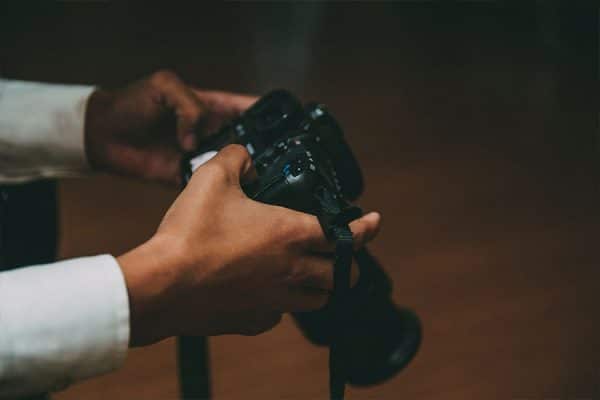
If you are shooting with a DSLR camera, you can use similar settings to what you would use for a portrait shoot. Shutter speed around 1/200, ISO setting around 200, aperture of f/5.6 or f/6.3 usually works well. You’ll need to make adjustments depending on the brightness of the lighting that you are using.
Related Questions:
What is a Ring Light? A ring light is a light that is shaped like a circular ring. It lets you take photos through the center of the ring and enables you to focus the light on a specific point of the object you are photographing. It produces a perfectly balanced light source that gets distributed nice and evenly across the subject. Some ring lights have features that allow you to change the brightness or the color of the light.
Should I Light my Background? While you don’t have to light your background, if you are using a dark or black background, shining a sperate light on it from the ground up, can make it look nice and less boring. The light will add a little gradient to the background and give it a little more character in contrast to just looking black.
Should I Post my Photos to Social Media? First, make sure to get the consent of the person in the photo, preferably written consent. Yes, posting them to social media sites like Instagram is a great way to get exposure for salon owners as well as photographers. A lot of people search social media for hairstyles they want themselves, and hair stylist themselves look there to get ideas. Salon owners may see your work posted and ask to hire you for a photo shoot at their salon.
I would also suggest, where possible, using direct sunlight as a great alternative to artificial light.