Topaz Labs is a Texas based software house that specializes in image modification and enhancement plug-ins for PhotoShop, Lightroom, Aperture, and iPhoto. Topaz plug-ins allow the user to quickly apply any of an included collection of visual effect presets to an image, and to tweak those effects via additional adjustment controls. Each plug-in typically focuses on a particular photographic effect or look, and allows the user to experiment with that effect as desired. Topaz Labs sells the plug-ins individually or packaged together as a bundle.
Topaz Plug-ins are accessed via the Filters > Plug-ins menu in PhotoShop, or with Topaz Fusion Express installed, you can select “Edit in Topaz Fusion Express” directly from Lightroom, Aperture or iPhoto. From there you can choose which individual Topaz module to use, which will display the editing and adjustment window for that particular effect.
For this review, I will be focusing on how I use the Topaz plug-ins within my post processing workflow, rather than on trying to describe the functions of any of the plug-ins in detail. The Topaz website has many excellent video tutorials, and I highly recommend watching the tutorials in order to get the most from their line of products.
Let’s start with this photo of a street art installation. It’s an interesting shot, but it lacks focus and impact. The piece reminds me a lot of Edvard Munch’s The Scream, so I decided to see if I could use the Topaz plug-ins to replicate some of the essential qualities of that work.

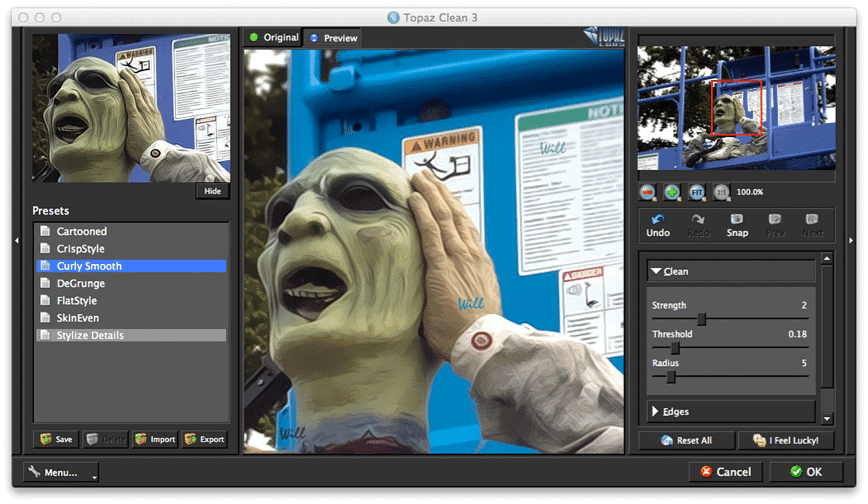
The first thing that I wanted to do was adjust the photo’s depth of field. In The Scream, the view is focused on the screamer’s face with the rest of the frame quickly losing detail. However, this photo was taken with a 50mm lens at F16, and the entire frame is in sharp focus. I decided to use the Topaz Lens Effects plug-in to simulate a shallower depth of field.
I started with the Creative Blur preset, which allows you to select the center, width, and height of the “in focus” area of the image. In my case, I centered on the area where the figure’s hand meets his chin, and adjusted the width and height sliders to isolate him from the background and foreground. Once you have determined the in focus area, you can adjust the amount of blur in the rest of the image. Voila – instant depth of field.
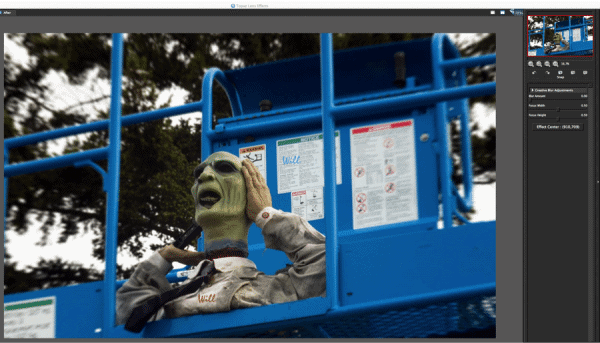
I also wanted to modify the image to look less like a photograph, and more like the original Expressionist painting. To accomplish this, I used the Curly Smooth preset of the Topaz Clean plug-in. This preset is very similar to the Anisotropic Diffusion filter in PhotoShop, but provides additional control via the adjustment sliders.
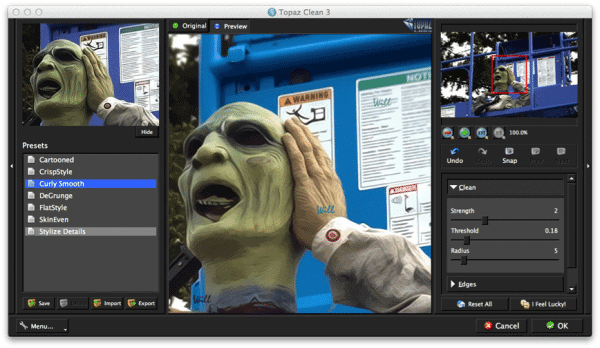
One issue that I have with the Topaz interface is the use of black sliders on grey and back backgrounds. I feel that this choice of color scheme makes it difficult to see the adjustment control positions, and I think a higher contrast theme would let the user see at a glance how each control affects the image – especially when stepping through the preset library.
It should also be noted that some Topaz presets are a bit heavy handed in the way they manipulate the image’s edges. This is particularly noticeable on large prints where the amount of edge manipulation can become quite obvious, and you may want to take that into consideration if you are planning to print large.
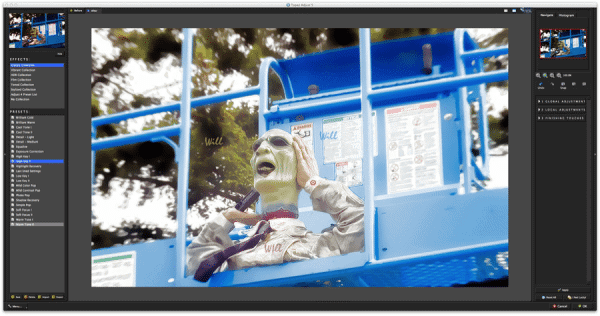
My image has now been modified to incorporate both the shallow depth of field and the Expressionist edges that I associate with the Scream. My next step is to modify the light treatment on the image to simulate the high contrast exposure of the original. For this, I bring the image into the Topaz Adjust plug-in, and apply the High Key II preset.
The high key light treatment goes a long way towards creating the effect that I want, but I still feel that the image lacks the overall impact that I am looking for. One of the qualities of the original Scream is the bright patches that exist in parts of the sky, water, and face. To add patches of brightness to my image, I turn to the Topaz Star Effects plug-in.
Star Effects is the newest (at time of writing) plug-in in the Topaz product line, and is the only one that is not currently offered as part of the Topaz Plug-in bundle. The basic purpose of Star Effects is to render flare and/or star bursts onto any bright areas of an image. For my example, I selected the Lamp Post I preset and the Hollywood Stars rendering style. The result is the photo below.
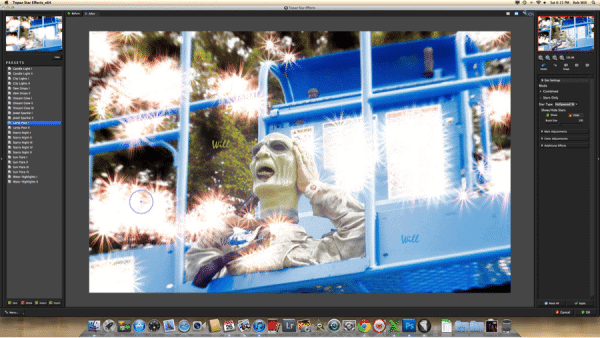
Interesting, but way over the top for this image. Frankly, when I looked at this result the first time, I had to wonder when an effect like this would ever be truly useful. Fortunately, you aren’t stuck with the “stars on everything” first cut that the plug-in generates. The interface also provides a very useful “Hide” brush that allows you to wipe away the patches of stars in the image that you don’t want. When I removed the extraneous star bursts, the image really came together.

So there you go. In this review, I’ve demonstrated a short workflow that shows how you can use Topaz plug-ins to quickly apply a combination of creative effects to an image. From start to finish, this image took me about a half an hour to complete, and that included a lot of experimentation. Technically, I might have been able to do a lot of these effects in native PhotoShop if I set my mind to it, but I never would have done them this quickly, or with this much control.
Final Word:
- Target Market: photographers and graphic designers looking for a comprehensive package of photo manipulation plug-ins.
- Usability: The plug-in interfaces can sometimes be dense and confusing, but Topaz Labs provides great video tutorials on their websites, and every plug-in comes with a proper user manual. I would like to see the color theme of the adjustment controls updated for higher visibility.
- Support: I’ve been using Topaz Labs plug-ins for about 3 years now, and have been very happy with their customer support. For example, when I switched to Mac from PC, Topaz Labs provided the Mac compatible versions of the plug-ins to me at no additional cost. When they add features to their plug-ins, Topaz labs also upgrades their existing users free of charge.
- Value for Money: Purchased individually, the Topaz collection of plug-ins can get pretty pricy. If you are planning to buy more than one or two of the plug-ins, the bundle provides the best bang-for-the-buck.
Rob Will
June 2012
