
Every photographer has to face the dreaded presence of grain or noise in photos.
Once it was a hallmark of film photography, grain has now become a sign of poorly executed photography technique.
Unless there’s a creative purpose to grain or noise in your images, it’s best to learn the strategies to make a picture less grainy.
Contents
How do you make a picture less grainy?
There are two strategies in digital photography to deal with grain.
First, know how to adjust your camera settings to avoid taking a grainy photo, to begin with.
Second, use post-processing software to edit out grain or noise in images.
Both strategies are easy to learn and can help improve the quality and appearance of your photos.
What does “grainy” mean in photography?
Before learning how to make a picture less grainy, it’s important to clarify:
What exactly is grain in photography and why is it something you might want to fix.
‘Grain’ in photography came out of the process of developing film.
Film grain is the tiny circles of lighter colors that develop on the surface of the image as a result of the way the dye adhered during the film development process.
It appeared in film photography most often in the darker areas of an image.
As digital technology emerged, grain evolved to describe both the tiny little circles in images, but other forms of ‘noise’ in photos.
Now, with DSLR and mirrorless cameras, “grainy” photos can mean all types of issues including color noise, color banding, or what’s known as luminescent noise.
Basically, grain now refers to any reason the pixels in an image don’t look exactly the same as the scene.
Why are grainy pictures “bad”?

While film photographers often sought a grainy texture to photos, most digital photographers work to avoid noise in their images.
When grain appears in your photos, it means that—for some reason— the image is not a representation of the scene in front of you.
If the goal in photography is to always capture a subject or a scene in the best possible way, you’ll want to know the tips and tools to prevent or remove grainy images.
The alternative to grainy photos in digital photography is what’s known as ‘tack-sharp.’
All parts of the image are in focus, and there’s no pixelation or color distortion anywhere in the picture.
This can be achieved both when taking the photo and sometimes when editing the photo in post-processing.
Is grainy different than dirt?
It’s common for beginners to mix up ‘grainy’ with actual dirt on the lens.
While they can both cause spots on an image, they are two entirely different issues.
Dirt on a lens or camera sensor is caused by external debris.
It can create odd spots or specks in an image.
The grain in photographs can also create odd spots or round flecks in a picture, but it’s caused by issues with lighting and exposure.
What causes photos to be grainy?
The short answer to what causes photos to be grainy:
using the wrong ISO.
Understanding ISO and how to configure the ISO on your camera is one of the easiest ways to fix grainy photos.
What is ISO?
ISO stands for International Organization of Standardization and is a setting on your camera that changes the light sensitivity of the camera sensor.
ISO is standardized across all camera manufacturers and brands. I
f you shoot with one ISO value on two different cameras, you should be confident that the light sensitivity of the camera sensor is exactly the same.
What does changing ISO setting do on a camera?
Changing the ISO setting on a camera allows you to change how sensitive the camera is to light.
DSLR ISO settings typically range from 100 up to 12,800 or higher.
The lower the number, the lower the sensitivity to light.
The higher the number, the higher the sensitivity to light.
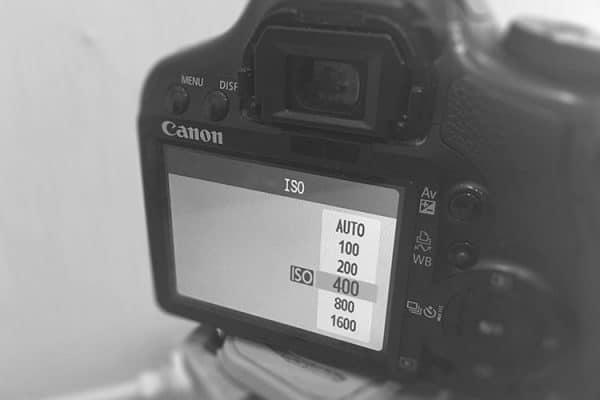
The standard ISO values are:
100, 200, 400, 800, 1600, 3200, 6400, 12,800, etc.
ISO settings are standardized to be a doubled value, meaning that an increase of one value or ‘stop’ equals a doubling of sensitivity to light.
ISO 200 is double the sensitivity as 100.
ISO 1600 is double the sensitivity of ISO 800 and so forth.
How is ISO related to grainy photos?
As a camera sensor is set to be increasingly more sensitive to light, it’s also more likely to cause noise or grain in the image.
How much noise or grain will depend on the lighting conditions, but in general, the lower the ISO setting, the finer the grain in the photo.
The higher the ISO, the more noise.
Higher ISO settings allow you to shoot photos in situations where there is less light.
It increases the shutter speed required to freeze movement, so it comes in handy in low light conditions where a subject is moving.
Is using a high ISO setting good or bad?

There’s no right or wrong answer to whether it’s good to shoot with a low or high ISO because every lighting situation is different.
Photography rules are also meant to be broken!
That being said, ISO is a balancing act.
Higher ISO’s stop motion better in low light conditions.
Higher ISO’s also cause grain.
Because of that trade-off, a photographer must decide what’s most important.
They either shoot on an AUTO-ISO setting, allowing the camera to choose the best ISO for the lighting conditions.
Or try to shoot on the lowest possible ISO setting to still stop movement in the image but limit the amount of grain.
Other Issues That Cause Grainy Images
There are two different issues you may want to consider that may be causing photos to turn out grainy.
These can include issues with camera sensor size and length of exposure.
Camera sensor size
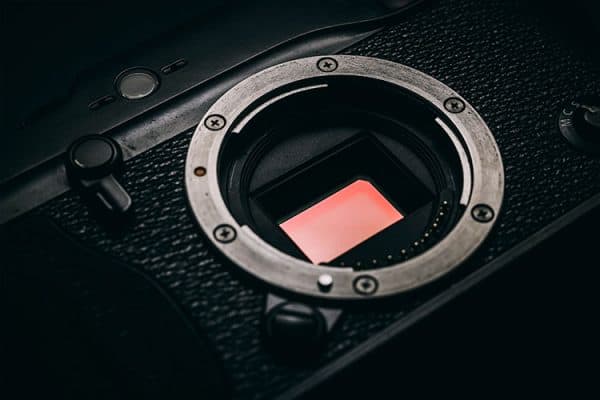
Not all camera sensors are built the same.
It’s possible that your camera sensor just may not be sensitive enough to capture an image in low lighting conditions (point-and-shoot, the earliest DSLR models).
Cell phone cameras are notorious for issues with grain because they don’t have adjustable ISO settings allowing you to change the sensitivity of the camera sensor.
If you know you’ll be regularly taking low-light photos, you may need to invest in camera equipment that specializes in low light.
Wrong exposure settings
As mentioned above, ISO and exposure go hand-in-hand.
As you change the ISO, your camera will adjust the shutter speed and the length of exposure.
In some lighting conditions, regulating the ISO may not be enough to avoid grainy images.
To avoid noise in the image, you may need to adjust the shutter speed and exposure settings themselves.
Long exposures can also cause incorrect colors and over/underexposure of the picture. The key is to know what’s best for your camera and the lighting conditions.
How can you prevent a photo from turning out grainy?
Now that you know a bit more about noise and how ISO relates to causing grain in photos, it’s time to learn how to avoid grain in the first place.
Preventing a grainy photo is far easier than correcting an image later on.
Following these 4 steps, whenever possible, will provide the best chance of getting tack-sharp, clear photos.
While it’s possible to fix grain in photos using post-processing software (see below), it’s best to learn the strategies to capture your image exactly how you see the scene at the moment.
It’s also helpful to know these strategies if you start to see grain in your viewfinder during a shoot.
You can quickly adjust and take better images going forward.
- Shoot in the lowest possible ISO setting. As mentioned above, it’s essential to get to know your camera and the best ISO settings for each type of lighting conditions. Start with the lowest ISO setting possible and then adjust to a higher ISO stop as needed. For full sun, bright lighting conditions start with ISO 100. For partial shade, overcast days, or shooting inside on a sunny day shoot with ISO 200. As you increase ISO above 400, begin to watch for noise. ISO above 1600 should only be used in extremely low-light conditions. You may decide to create an ISO cheat-sheet for yourself to help with lighting conditions.
- Use noise-reduction settings in your camera. Many DSLR cameras are now equipped with noise-reduction technology. If your camera has Long Exposure Noise Reduction (LENR) or High ISO Noise Reduction, it has built-in technology that helps reduce noise when you may need to shoot with a High ISO or are configured for a long-exposure shot. If your camera does not have this technology, you may want to consider a higher-end or newer camera equipment.Note that it’s best to only turn this setting on when you need it. Long Exposure Noise Reduction (LENR) or High ISO Noise Reduction will gently smooth the noise in an image which may also smooth the fine details and lines of an image. You may lose some of the crispness or texture of parts of your image as a trade-off to reducing the grain.
- Shoot in RAW format.
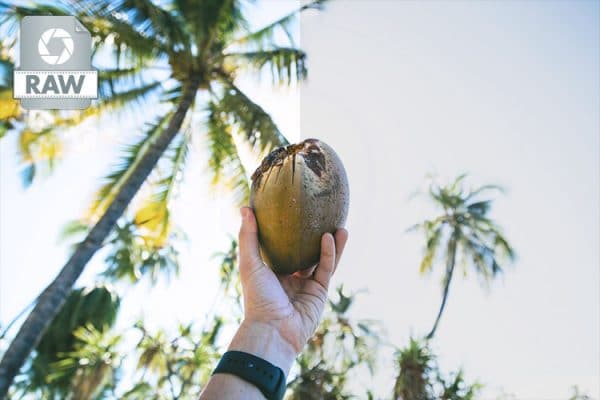
 This has become a standard practice among many digital photographers and should be considered for all situations where grainy photos may become an issue. Shooting in RAW format vs. jPEG allows you more control in post-processing to edit your photos, including some of the editing techniques outlined below on how to make a picture less grainy.
 - Slightly overexpose and edit the highlights later. If shooting in RAW in tricky lighting conditions where noise may become an issue, you may already know you’ll need to edit out the grain in post-processing. In this case, one strategy you might consider is overexposure. By shooting the image (in RAW format) with a slight overexposure, you can avoid some of the noise or grain in the picture. In post-processing then, you’ll need to adjust the highlights to remove the overexposure, but it can allow for a more natural-looking image.
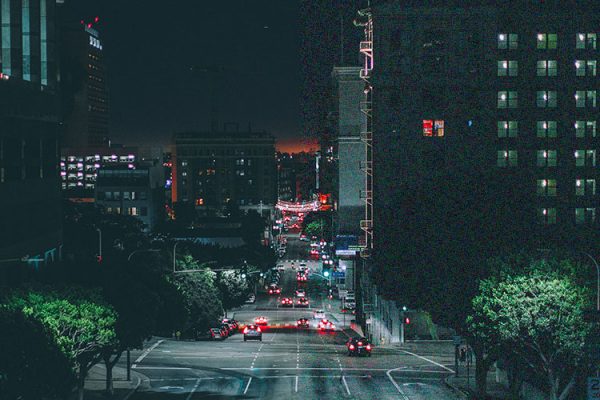
How do you shoot in low light without creating a grainy photo?
As mentioned above, one of the situations that most frequently causes issues with grainy photos in low light photography.
This could include night photography or indoor photography in a darkened room.
What happens in these situations is there is not enough light for the camera sensor to capture the image correctly, causing noise in the image.
To shoot in low light without getting a grainy photo, you must let as much light into your camera as possible, otherwise known as long exposure photography.
Setting your shutter speed as low as possible will allow more light into the camera sensor and reduce the amount of grain in the image.
For low light photography situations like this, you should consider image stabilization and turning off auto-focus settings on your camera.
Image stabilization will help reduce blur from the long exposure shots.
The auto-focus is not likely to perform well when in low light environments.
Finally, whenever possible in low light photography situations, you should also use a tripod and a remote shutter release.
These tools will also reduce blur and camera shake when shooting long exposure shots.
If you don’t have a tripod, balance your camera firmly against a wall or against a solid surface.
Use your camera strap and hold the camera as stable against your body as possible.
How do you repair a grainy photo after it’s taken?
Despite all the best techniques, inevitably all photographers will end up with a grainy photo now and then.
It can be especially frustrating if you’ve got a terrific shot of a subject, but the technical aspects of the image are poorly executed.
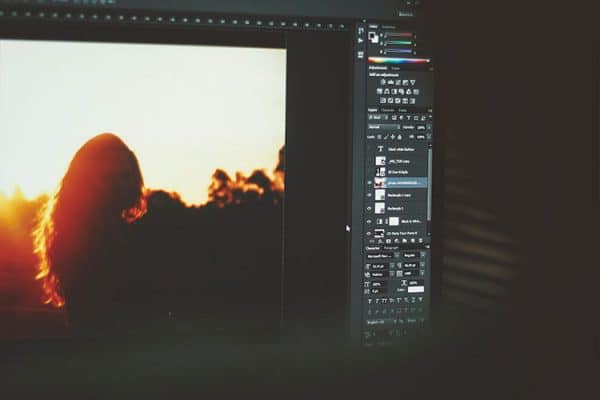
Thankfully, some useful tools can be implemented with software like Photoshop or Lightroom to make a picture less grainy.
Photoshop and Lightroom both have specific features for eliminating noise and grain in photos.
While each platform uses slightly different terms for noise reduction technology, the principals are essentially the same:
Balance noise reduction and smoothing the texture of the image.
There are also some strategies to fix a grainy picture if you don’t have experience with a photo editing software package.
Step-By-Step Editing Guide for Photoshop
Step One:
Locate the image on your computer and open the image in Photoshop.
Step Two:
Zoom into an area of the photo most severely impacted by grain. It’s best to zoom in on your subject’s face or the primary topic of the image.
You’ll want this part of the image to look the best, so start there.
Step Three:
Open the reduce noise reduction filter under the filter options.
Filter > Noise > Reduce Noise.

Step Four:
Once the noise reduction filter tools are open, you’ll notice several slider options, including strength, reduce color noise, and sharpen details.
The next step is to adjust these sliders back and forth until you improve the look of the image.
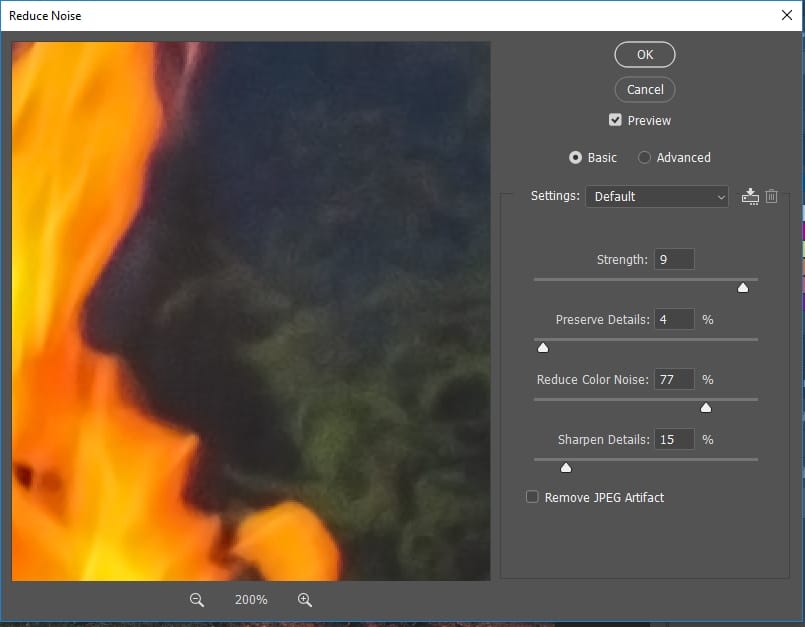
Each of these parameters will adjust the grain and noise in the image.
Start by adjusting one filter parameter first, and then slowly adjust the other filters in turn until you remove the grainy appearance of the picture.
There’s no one-size-fits-all solution for editing grain in Photoshop.
You’ll need to balance the sharpness of the image by reducing the amount of noise.
Editing too much out of the image and some features of your subject may appear artificial or ‘plasticky.’
Step Five:
Once you finish editing the photo, zoom back out, and preview the full image.
Are there other areas that need attention to detail?
Does the image capture the tone or story you attempted to tell or is something lost now that the grain is fixed?
Step Six:
Save the version as a duplicate.
Open the original image and compare them side-by-side.
Double-check that the balance between reducing the noise and capturing the details of the image are suitable to tell the story that you’re hoping to capture.
If not, repeat Step 4 and edit the sliders again.
Continue this process until you achieve your desired image.
Step-By-Step Editing Guide for Lightroom

Step Two:
Locate the image on your computer and open the image in Lightroom.
Step Two:
Zoom into an area of the photo most severely impacted by grain. Again, try to focus the detail editing area on the key part of the subject you want to correct.
Step Three:
In Lightroom, begin editing the photo by locating the Details panel under the Develop module.
Opening this panel will open up options to both sharpen and reduce the noise of an image.
Similar to Photoshop, the panel will provide several different slider options, including Luminance, Detail, and Contrast.
Step Four:
Adjust the sliders.
Begin with the Luminance slider, moving it to the right to reduce the noise in the image.
Then adjust the Detail and Contrast sliders to change the sharpness of the details in the image.
Again, there are no ‘magic’ formulas for the best numbers to push the sliders to.
Every image is different and every image requires careful attention to the balance between sharpness and noise reduction.
Step Five:
Save a version of the image or use the comparison tools to go back and do a “before/after” comparison of the two shots.
If additional edits are needed, repeat Step Four until you’ve reached the desired appearance of the image.
A Note About Presets
If you find yourself editing noise and grain out of many of your photos (and you’ve already tried the techniques to reduce it in the first place) you may find that presets in Lightroom or Photoshop are a helpful tool.
Both Lightroom and Photoshop can be configured with presets for Noise Reduction that will automatically balance out your noise/grain levels and sharpen key areas of an image like faces and eyes.
You can also purchase presets from other photographers and upload those configurations into Lightroom and Photoshop, or you can create your own and save them to use time and again.
As a note, though, the noise and grain of every image will be different.
Even if you use a preset, you may need to go back in an do some custom editing on each photo to achieve a consistent look across all your images.
Adding Grain to Hide Grain in Images
The final tool worth mentioning when fixing grainy images is that sometimes the best strategy may actually be to add more grain and noise to an image.
If you’ve already attempted to edit the noise out of a High ISO image and haven’t been able to edit the noise successfully, you can also consider adding grain into the picture and make it look intentional.
This can be particularly effective in black and white images which may naturally look better with a bit of grain and noise.
There are options to add noise into an image in both Photoshop (Add noise feature) and Lightroom (Effects Panel).
How to fix grainy photos without Photoshop or Lightroom
As a beginning photographer, you may not be interested in spending on a professional-grade editing software like Photoshop or Lightroom.
While ultimately these platforms offer the highest quality and highest number of editing tools, it is possible to use free software or the photo editing software that came with your camera or computer to edit noise.
The features for each of these softwares will be different, and they may not offer the same level of customization.
However, most if not all free or basic photo editing software should include noise reduction tools.
Some plugins and filters can be downloaded free from the web that specifically target noise reduction if your basic software package does not.
Finally, there are a number of iPhone and Android apps currently available that offer noise reduction technology.
It will require the extra step of uploading images to your mobile phone, and it may be more difficult to edit with the care and detail you would edit with on a computer monitor—but it is possible to use an app-based option to make a picture less grainy.
Sum it Up: How to Make A Picture Less Grainy

Now that you know what causes grainy images, some strategies to prevent grainy photos and some techniques to fix them here’s a summary of everything you need to know to make your pictures less grainy:
- Use the lowest ISO setting possible.
- If you have to use higher ISO settings, use the noise-reduction settings on your camera or slightly overexpose the image.
- Use the noise reduction sliders, filters, or presets in your editing software to quickly reduce grain.
- Step away from images during post-processing and review them later. Check for loss of texture and detail when correcting for noise.
Related Questions
Is there ever a time you want to have a grainy photo?
Like all photography rules, the standards about grainy photos are sometimes meant to be broken.
There may be times when you might intentionally increase the grain of your pictures as a creative element.
The two most common reasons to do so: to hide imperfections and to re-create the look of a vintage image.
In post-processing, if you’re caught between having a bit of grain in your photo or having a slightly out-of-focus image, some photographers will opt to hide the imperfection of the focus by having a bit more noise.
It’s rarely used and should only be done with someone experienced in post-processing techniques.
Other photographers may introduce noise to replicate a photo from the past or create a nostalgic feel to their images.
Most often these photos are taken to emulate pictures taken on film, including black-and-white or sepia photos.
Why are my cell phone photos more grainy than my DSLR camera?
Unlike DSLR cameras which have multiple options to customize how light hits the camera sensor, cell phones have fewer options to prevent grainy photos.
In general, the size of the camera sensors are smaller, and they lack the option to customize ISO.
It’s possible to use some of the same techniques above to improve grain in cell phone images, including slightly overexposing the image and applying noise reduction software to edit the photo later.
These are especially helpful in low-light settings where cell phones perform poorly.
While the technology continues to improve at a blistering pace if you’re looking for tack-sharp photos with minimal grain, you’re better off opting for a DSLR camera.
What causes a photo to be blurry?
Two common things cause blur in photos:
The motion of the subject you’re photographing and camera movement.
In the first option, the subject was moving too fast for the camera sensor to stop the action in the frame of the photo.
This comes down to an issue of choosing the correct shutter speed for the available light.
Too slow of shutter speed and the subject will be blurred.
The second option—camera movement— means the camera itself moved while the shutter fired.
Camera shake results from several different scenarios, including the motion of pressing on the shutter release button, improperly holding the camera or the internal vibrations caused by the shutter release button.
How can you prevent blurry photos?
Unlike grainy photos which can be edited in post-processing, blurry images are nearly impossible to fix using Photoshop or Lightroom.
The best way to handle blurry photos is not to take them in the first place.
Learning the strategies to take tack-sharp photos every time can avoid the headaches of post-processing later on.
Try these steps to prevent blurry images:
- Hold your camera properly. To hold a camera correctly, stand with your feet shoulder-distance apart and firmly planted. Place your left hand under the lens (not on the side of the lens). Spread your fingers apart wide, creating a flat ‘table’ to stabilize the lens. Then, with your right hand, hold the camera with enough pressure that it presses slightly against your forehead. Tuck your elbows in and keep your upper arms tight against your chest.
- Using the wrong auto-focus or image stabilization settings. Most DSLR cameras have auto-focus and image stabilization settings that can help assist with camera blur. These settings help determine the focal point of the image and automatically adjust the shutter speed to capture the movement of that particular subject. The autofocus settings on each camera model operate slightly differently, and many cameras come with different options (e.g., auto-area autofocus vs. single-point autofocus). Your camera will perform differently depending on how you use the autofocus and image stabilization features. Learn how they operate on your camera and adjust accordingly.
- Rushing to take a photo. For most photography situations, rushing to take a picture without thinking through your settings is going to result in a low-quality image. Stop for a few seconds to allow yourself to take stock of the lighting, your subject, and how you can adjust your camera settings to prevent blurry photos. Make sure you’ve got the best combination of shutter speed and ISO to capture the motion of the subject. Lighting and the subject’s movement can change quickly, so it’s also a mistake not to adjust ISO and shutter speed frequently throughout a shoot. Don’t just “set it and forget it” and expect to have tack-sharp images.
- Use a tripod, self-timer, or a remote shutter release. If you continue to have issues with camera movement related to pressing the shutter, you may want to consider an alternative way to fire your camera. Use a tripod to provide extra stabilization when taking an image. Even better, pair it with the self-timer setting on the camera or a remote shutter release. All of these additional features will reduce the amount of camera shake present when the camera shutter fires.