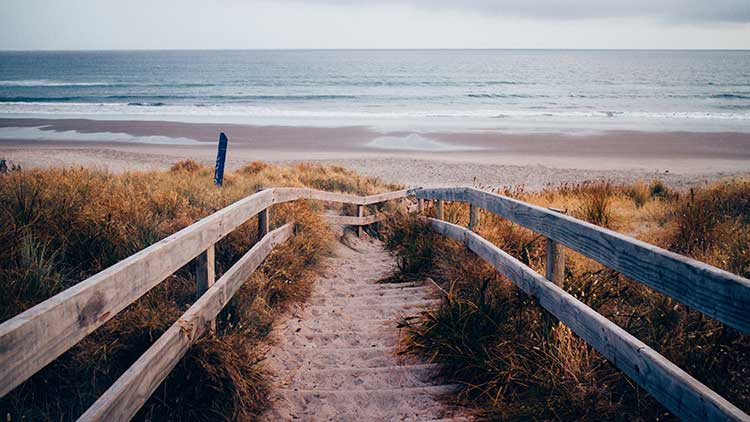
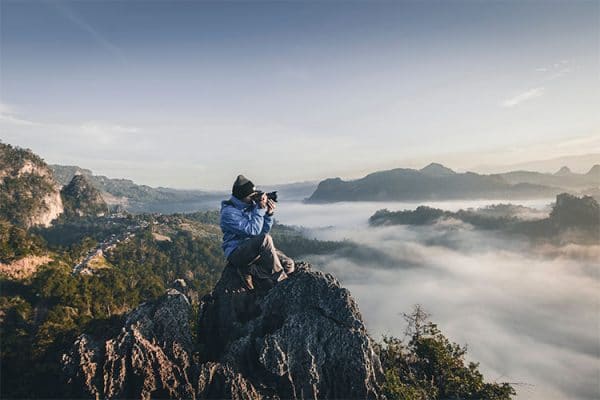
Landscape photography ranks among the most popular genres in all of photography.
Taking gorgeous photos on vacation is one of the reasons many people buy a DSLR camera in the first place.
If you have an interest in landscape photos but have trouble getting tack-sharp images or photos that tell a captivating story about a particular location, you’ve come to the right place.
Understanding the best aperture and shutter speeds for landscape photography can help you achieve the gallery-worthy images every time you shoot.
So, what are the best aperture and shutter speed for landscape photography?
While there are no such thing as perfect camera settings, the ideal aperture and shutter speeds for use for landscape photography maximize depth of field and sharpness.
Struggling to find the perfect camera settings may end up causing more frustration, or even causing you to miss the shot.
Instead, start with these ideal settings, then—depending on the lighting and subject of your landscape—adjust them as needed.
Below you’ll find the ideal aperture and shutter speed settings, along with some strategies, tips, and gear to improve your landscape photos.
Contents
Best Aperture for Landscape Photography
As mentioned above, the best aperture for landscape photography maximizes depth of field and sharpness.
Traditionally, the foreground and background in landscape photos all have tack-sharp focus.
It requires configuring your camera to ensure that the nearest and farthest items in your image are both in focus.
While it’s possible to use a technical depth of field chart to achieve ‘front-to-back’ sharpness, most experienced landscape photographers shoot with a few aperture rules in mind:
- Start with f/16. Almost everything is sharp at this aperture, and it’s well-suited for telephoto lenses or landscapes with a close foreground.
- For distant landscapes, try f/8 or the sharpest measured aperture your lens allows.
- For wide-angle lenses or landscapes with more details in the foreground, use an aperture of f/11.
That’s it.
There are only three simple rules for setting the aperture to have the most success taking landscapes.
While there are some caveats for specific scenarios (see below), starting with these three rules covers the majority of landscapes you encounter.
What becomes more important is knowing how to set your shutter speed for landscapes optimally.
Best Shutter Speed for Landscape Photography
When it comes to taking technically superior landscape photos identifying the ideal shutter speed is just as important as aperture settings.
Shutter speed determines how much movement there is in an image. Love those stunning waterfall photos with perfectly blurred water?
You’ll need the right shutter speed. Want to try shooting night landscapes with the perfect amount of stars? It’s shutter speed again.
Just like with determining aperture, there are some common ways to calculate the best shutter speed for the scene you’re shooting.
Shutter Speeds for Landscapes
The first step to determining your shutter speed setting for landscapes is dependent upon if you have a tripod.
Tripods rank high in the essential gear items for landscapes (see below) because they open up a much more full range of possible shutter speeds by eliminating camera movement.
Shutter speeds read at fractions of seconds in standard intervals like 1/4000, 1/2000, 1/1000, 1/500, 1/250, 1/125, 1/50, 1/30, 1/15, 1/8, or 1/4.
For long exposure photography, shutter speeds range from 1 second, 2 seconds, 5 seconds, up to a manual shutter release mode held open as long as the photographer desires.
If you’re using a tripod, you can adjust among all of these shutter speeds based on available light.
If you are not using a tripod, you must use a shutter speed no slower than the max focal length of your lens.
For example, if you’re using a 50 mm lens, your shutter speed should be set at 1/50th or faster.
Depending on your camera posture and technique, you may find that to freeze movement in a landscape, you might need to go higher when holding your camera, to shutter speeds of 1/125 or 1/500.
When to Use Fast Shutter Speeds
Fast shutter speeds (1/250 or higher) are useful in landscapes where it’s essential to freeze fast movement.
Shutter speeds of around 1/250 freeze motion of water, slow-moving wildlife, or general movement in landscapes like grass, leaves, and trees.
As you increase into faster shutter speeds, 1/1000 freezes the action of cars or wildlife moving more quickly.
Shutter speeds of 1/2000 or higher are necessary to freeze fast-moving objects like a kite or a bird that may be moving through a landscape.
When to Use Long Shutter Speeds
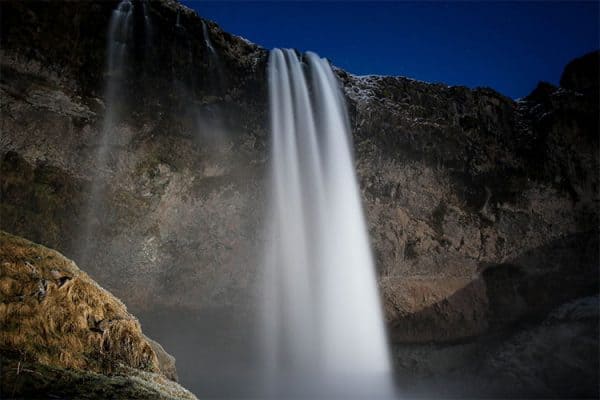
If you’d rather have smoother, blurred motion in your landscape photos, you’ll need to learn how to use longer shutter speeds (1/15 or longer) properly.
Shutter speeds like 1/8, 1/4, or longer are especially popular for blurring moving water sources like waterfalls and rivers.
With the right aperture, the background remains in perfect focus, but the water has a smooth, dreamy effect.
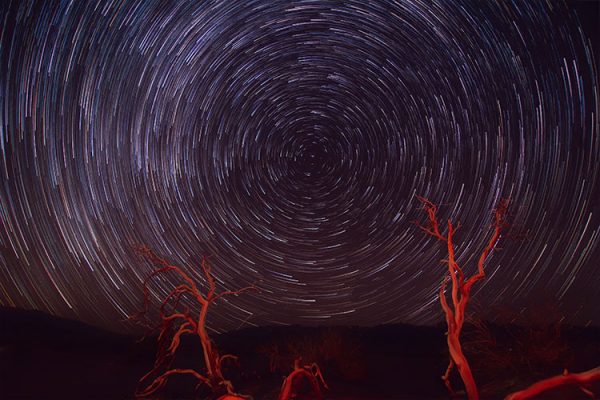
Landscape photography that includes the night sky or star trails also uses extended shutter speed settings.
Many of these astrophotography photos use shutter speeds at 20 seconds or longer.
For star trails, it can take a shutter speed of 10 minutes or longer to achieve the desired streaking effect across the image.
How to Use Bulb Mode Longer Shutter Speeds
There are no right or wrong ways to use long shutter speeds for landscape photography since much of long-exposure composition is more art than science.
However, when photographing shutter speeds longer than 30 seconds, you may want to use your camera’s ‘Bulb Mode’ setting.
Bulb mode allows the camera shutter to remain open until the photographer removes their finger off the shutter button.
If using a remote shutter release and a tripod, the camera shutter remains open until the photographer presses the remote release button a second time.
The only limitations to bulb mode are your camera’s battery life and how long you’re willing to hold open the camera shutter.
Bulb mode is most often used for night landscapes or very low light landscapes.
Nearly all thunderstorm or lightning photography use bulb mode with a tripod and remote shutter release.
Many star trails, fireworks, and star trail landscapes also use bulb mode settings.
Most DSLR cameras require shooting in Manual mode to engage the bulb setting.
Turn your camera to manual and then adjust your shutter speed to the lowest possible setting.
On some camera models, a “B” symbol displays on the LCD screen when in bulb mode.
While not all landscape scenarios are best captured with bulb photography, it can be a helpful addition to your photography toolbox.
Other Settings for Landscape Photography
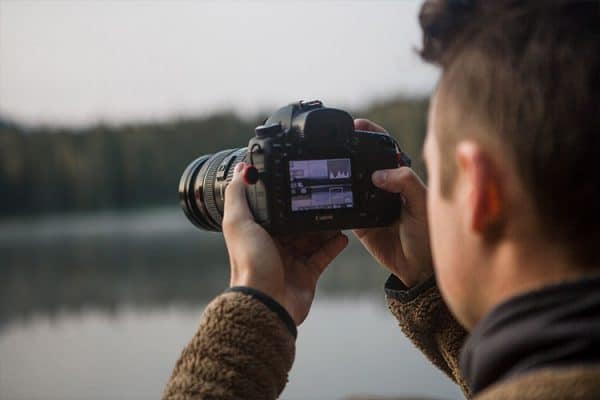
Now that you’ve got a sense for the best aperture and shutter speeds to use for landscape photography, it’s essential to understand how to configure the other settings of your camera to enhance your photos.
Shooting Mode
As mentioned above, the shooting mode you select for landscapes should depend on your experience with your camera and the type of lighting conditions.
Many photographers choose to shoot in Manual mode to achieve the most customization, especially for long exposure or low light landscapes.
If you’re not comfortable with Manual mode yet, Aperture priority is a second choice that many professionals use.
Your camera may also have a landscape pre-set mode. Camera manufacturers gather the most common settings for landscapes, including city skylines, nature scenes, and subjects in the far distance.
Typically these modes use a small aperture (f/16), and shutter speed around 1/100 to create a large depth of field where both the foreground and background are in sharp focus.
While it may be suitable to use the pre-set landscape mode in some situations, your camera may struggle to perform in some lighting conditions.
ISO
ISO settings on your camera determine how sensitive the camera is to the available light.
The higher the ISO (3200 and above), the more sensitive the camera is to the available light and subsequently, the shorter the shutter speed needed.
When shooting landscapes, the subjects are not typically moving so there’s less reason to have a high shutter speed (and subsequently a high ISO setting).
In general, the best landscape photos use the base ISO of 100-200.
If you continue to add ISO when it’s not necessary, the higher the likelihood of adding noise to your photos.
RAW Format
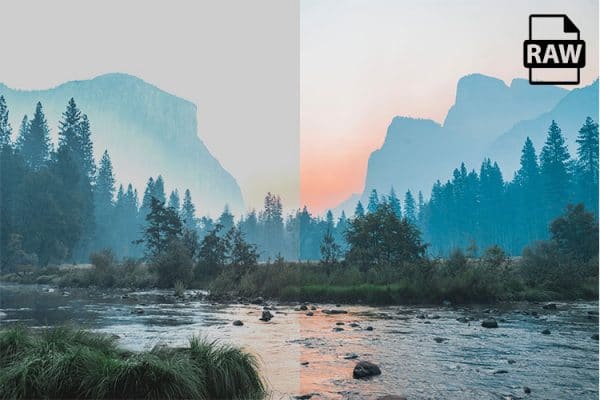
It may sound like a broken record to be talking about shooting in RAW format, but once again, it’s the best option for landscape photography.
Shooting in RAW format or RAW + JPEG gives you the most flexibility in adjusting your files later.
If you’re learning new editing techniques to sharpen up your landscape images, or you like heavily edited images shooting in RAW format always gives you a better final product.
White Balance
The final camera setting you’ll want to consider when shooting landscape images is white balance.
When shooting landscapes, you’re likely to encounter all different types of lighting situations.
Sunsets, mountains, bright sunshine, snow-covered trees, or diffused light reflecting off a brightly colored scene are all different types of lighting scenarios that create light with a different color.
Subsequently, your camera sometimes needs help to determine the natural color of the light or the white balance settings.
You’ll need to configure white balance to be warmer or cooler to match the natural light conditions.
Double the Distance Method
Another way that landscape photographers use to achieve a tack-sharp foreground and background in landscapes is called the ‘double the distance’ method.
This technique focuses your lens so that subjects in the foreground and background are both in focus. Here’s how it works:
- Start by identifying the closest item in your frame and estimating how far away it’s from your camera sensor. There’s no need to bring a tape measure for exact distance, but if you need to, you could pace it off. The measurement doesn’t matter either; you could measure in meters, yards, miles, or whatever seems most appropriate to you and the scene.
- When you have that distance in mind, then double it and set the camera to focus at the doubled distance. When calculated correctly, the foreground object and the background object have equal amounts of focus.
While it is an excellent way for beginners to master landscape foreground and background focus, the double the distance method does have some limits.
It’s only useful in images shot from directly on, tilt your camera in any way, and the technique doesn’t work well.
It’s also important to note that the double the distance method does not always result in maximum focus; it results in equal focus.
You may find that some images end up blurred or are too challenging to shoot.
Finally, the double the distance technique also assumes that the horizon is the farthest distance in your photo (or an infinite distance from the camera sensor).
If you use a telephoto lens or if you’re shooting were architecture or fog shortens the maximum distance, you may experience issues with the calculation.
In this case, you’ll want to shorten the doubled distance and then use trial and error for the best results.
The Best Camera Gear for Landscape Photography
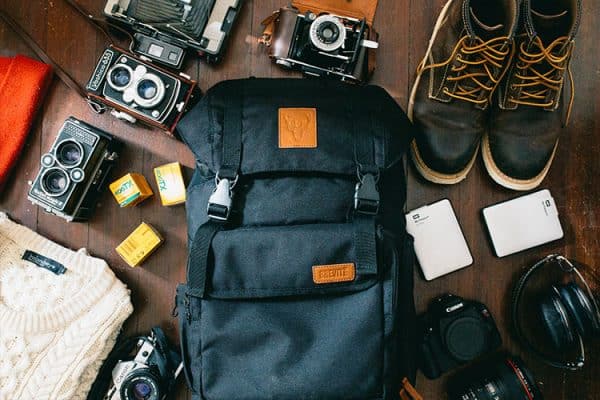
Now that you know the best camera settings for landscape photography, the next step is to cover the best camera gear to have for shooting those classic scenes.
Camera gear for landscape photography should be durable, flexible, and easy to manage while you are outdoors.
Consider adding these items to your gear for the best landscapes:
- A study tripod – As mentioned above, the options for shutter speeds and ISO improve if you have a sturdy tripod available when shooting landscapes. Attaching your camera to a tripod and using a remote shutter release allows photographers to capture long shutter speed images, night landscapes, and tack-sharp landscapes. Consider a good quality tripod that can stand up to the wind and weather part of your ‘essentials.’
- Lenses – Landscape photography demands that lenses produce both high-quality images and are lightweight and easy to use. When purchasing lenses specifically for landscapes, focus on getting as much speed (a fast prime lens) and then something functional at a good range of focal lengths including wide-angle and zoom. Some popular lens sizes you may wish to consider: a 24 mm prime lenses, a 24-70 mm zoom lens, and a 70-200 mm telephoto lenses.
- Filters – Believe it or not, professional photographers rotate among nine different filters in landscape photography. Of those 9, there are four filters considered to be ‘essential’ for whenever you shoot outdoors. When added to a camera lens, filters enhance or change the quality of the available light. They also act to protect lenses from dirt, water, and debris. We have an entire in-depth article on different filters for landscapes, but recommend at minimum carry a circular polarizing filter, a UV filter, a neutral density filter, and a graduated neutral density filter in your camera bag.
- Water/Wind protection – If you ask a professional photographer what he or she dreads the most, the words’ water’ and ‘dirt’ regularly appear up on the list. If you intend to shoot landscapes and take your camera outdoors inevitably, bad weather will arrive. Rain, fog, sand, wind, water, dirt, and debris can all create havoc for your camera. Issues range from sensor and button corrosion to malfunctions with the LCD. At a minimum, you should always carry and disposable rain cover, plastic bag, or some form of protection from water. You should always avoid changing lenses outdoors or in the wind.
- Proper Cleaning Equipment – Along with water and wind protection, landscape photographers need to take special precautions to clean their camera gear after every use properly. Purchase and learn how to use a high-quality brush, blower, and cleaning kit. It’s helpful to get in the practice of cleaning your camera, lenses, and any attachments at the same time you store it after an outdoor shoot. That way you can always guarantee your camera is ready to go when you are.
- Camera Bag – If you plan to be shooting a lot of landscape photography, more than likely you’ll find yourself trekking camera gear through some harsh conditions. Making sure you have a proper camera bag or backpack should be on your list for outdoor shoots. Standard outdoor backpacks don’t have the padding and protection to prevent lenses and camera bodies from getting damaged in the elements. Entry-level camera bags or those sold with DSLR camera kits can be hard on your back and shoulders, especially if you spend time hiking. Do some research on camera bags for landscape and professional wildlife photographers. These people are experts in selecting something that is engineered to be both comfortable and protective.
Tips for Special Landscape Photography Scenarios
Now that we’ve reviewed the ‘rules’ or the best camera settings and camera gear to help you take gallery-worthy landscape photos, it’s time to review the scenarios to break those rules.
Certain lighting situations and certain landscapes create unique opportunities to adjust the technical settings of your camera.
Minor tweaks can help you better capture these more tricky landscape scenarios.
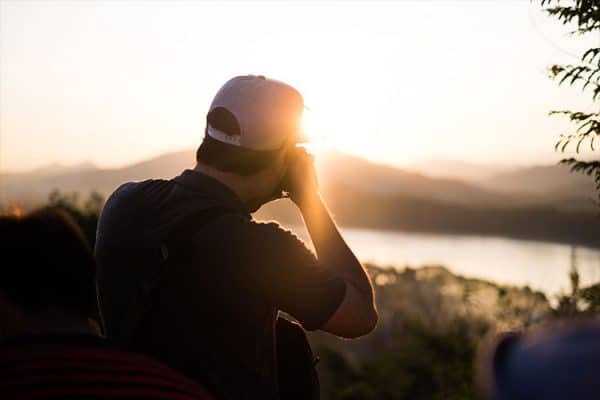
Sunrise/Sunset Photography
One of the most popular photography questions beginners ask is, “how do I take a better sunrise or sunset picture?”
Humans are naturally drawn to the light at the beginning and end of the day.
Capturing them in the same way the naked eye sees the light can be challenging without the right techniques.
First, be sure to check the local weather conditions for sunrise and sunset times.
Allow yourself enough time to arrive at the location and stay there during the duration of the sunrise or sunset.
Sometimes the most stunning images happen just before or after the posted times.
Also, be sure to adjust your shutter speed, aperture, and ISO throughout the time you shoot.
Lighting conditions change 30 minutes before, during, and just after sunrise or sunset.
Snow or winter landscapes
Shooting snowy winter landscapes have to be among the most challenging landscapes to capture.
While the stillness of a quiet winter scene can be captivating, the light reflecting from the snow creates havoc for your camera sensor.
It cannot correctly tell how much light is necessary to expose the image correctly, and images frequently turn out darker or off-color.
To compensate, you’ll want to configure the exposure manually, and if possible, slightly overexpose the image to adjust for the snow.
Also, snow often means exposing your camera equipment to cold temperatures.
Lenses and batteries struggle in temperatures below 20°F (-7°C). So can fingers and toes if not adequately covered.
Take some extra time to prepare for shooting any scenes when the temperatures drop.
Fall landscapes or fall foliage
Changing seasons from winter to fall also requires some changes to your camera settings.
Fall photography in areas that experience vivid fall foliage is a favorite among amateur and professional photographers alike.
For outstanding fall foliage photos, try backlighting the leaves, allowing the sunlight to float through the bright orange, reds, and yellows of the leaves.
You might also try combining fall foliage with a long-exposure water scene.
Bright leaves balance well with the soft, flow of a river or waterfall.
Rainbows
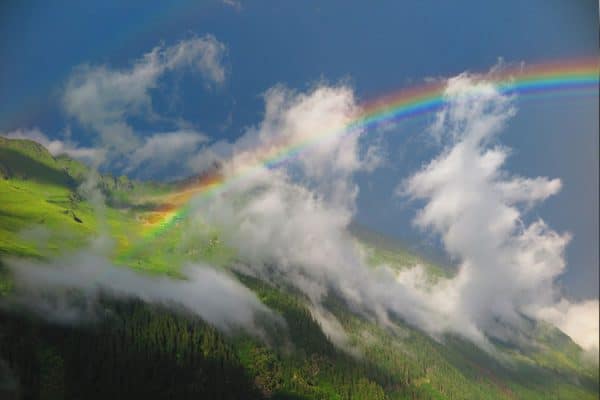
If you happen to get lucky enough to spot a rainbow when you have your camera in hand, prepare with the best settings to capture the landscape.
There are several keys to great rainbow photography, including making sure to capture at least one endpoint of the rainbow, using a large depth of field as possible (by choosing a small aperture), and a tripod to take advantage of longer shutter speeds.
Also, if you have an option to use a wide-angle lens, often that can give increase the likelihood of capturing more of the rainbow and the landscape.
Aurora Borealis Photography
Aurora, what?
While you may not be familiar with the term, more than likely you are familiar with the jaw-dropping landscape images of swirling green-yellow colors in chilly winter skies.
Otherwise known as the Northern Lights, capturing the Aurora Borealis ranks high on many photographers’ wish lists.
Found only in the far northern hemisphere, often in freezing temperatures, photographing the Northern Lights requires a bit of luck and the right gear.
Luck, because the temperature and weather conditions must be perfect for the aurora to appear.
The right gear, because you’ll need a tripod, wide and fast lens, and a remote shutter release.
Trial and error are your friends when capturing the Northern Lights.
Choosing a short shutter speed to capture the movement of the light in the sky is essential, but difficult with low light.
Cloud Photography
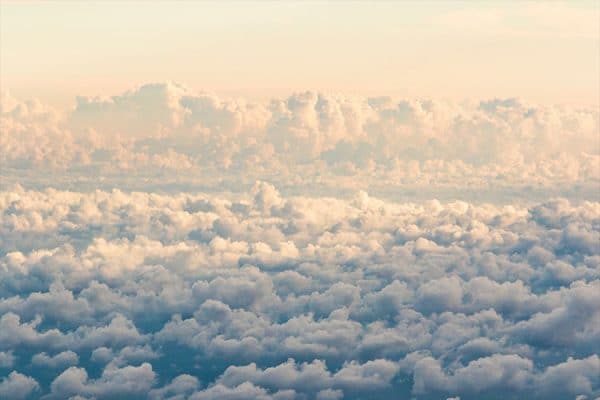
While clouds aren’t often the focus in landscapes, occasionally they can take center stage in your image.
If you happen to catch a particularly interesting sky, some technical tips can improve the definition and eye-catching character of clouds.
First, it is crucial for image quality to get the exposure as exact as possible when shooting clouds.
Slight over or underexposed clouds can quickly dampen the quality of an image.
Try shooting clouds just before, during, and after the golden hour for different lighting.
If possible, shoot clouds as part of a reflection image, perhaps reflected off a body of water or a window.
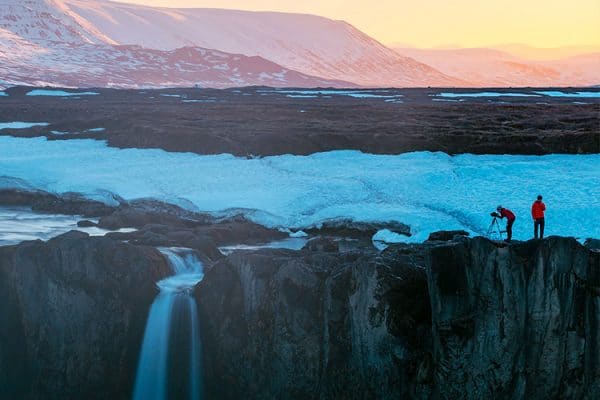
Waterfalls
Waterfalls are among the most famous bodies of water for landscape photography, in part because of the soft, dreamy feel that long-exposures impart on waterfall scenes.
Capturing waterfalls requires good timing and the right gear.
Whenever possible, bring a sturdy tripod (to help with noise and camera movement during long exposure shots) and bring something to protect your camera from any water damage.
Some landscape photographers like to bring along neutral density and graduated neutral density filters to customize lighting better when shooting waterfalls, but that’s not always necessary.
Especially if you plan to shoot on cloudy or overcast days, they often are the best lighting for shooting waterfalls.
Urban and City Skylines
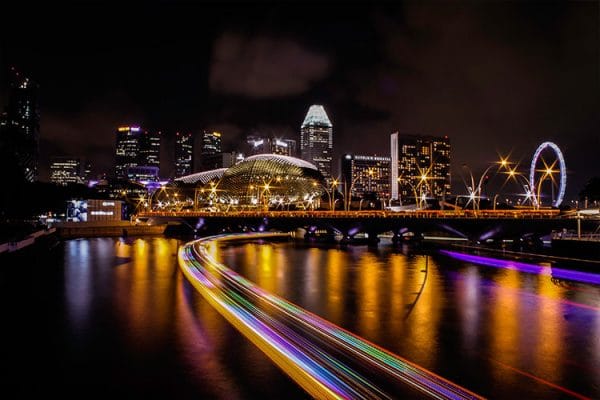
Not all landscapes occur in remote wilderness locations.
Some of the best landscape photographers center their images on urban landscapes, including city skylines, night scenes, or reflections of a city in a local body of water.
The same strategies apply to urban landscapes as they do natural ones.
Try for large depth of field.
Adjust shutter speed to either freeze or blur motion, depending on the subject.
Moreover, adjust the white balance to compensate for any human-made lighting sources present in the image.
Some other tips for shooting attractive urban or city landscapes, try shooting from different angles and perspectives.
Landscapes shot from a vantage point slightly below or slightly above a city skyline can be powerful.
So can shooting an urban scene from a distance, changing some of the buildings to background elements rather than the foreground subject.
Finally, grab a tripod and try long exposure urban landscapes.
Reflective landscapes
While many photographers work hard to remove glare from images, sometimes reflection is just the creative element you need when shooting a landscape.
Every beginner photographer should take the time to learn how to properly take a reflection photo from a glassy pond or shooting a sunset reflected off a building.
It requires patience, an eye for identifying the best reflections, and a tripod with a shutter release.
Shooting through glass requires some experience with adjusting angles and the Law of Reflection.
Mastering the techniques of reflective photography though can a valuable tool for your photography toolbox.
Black and White Landscapes

Not all landscapes need to be shot in color.
Some consider black and white landscapes a stand-alone genre of photography, including legends like Ansel Adams and Edward Weston.
It requires a unique eye for contrast and an understanding of what types of scenes perform well in black and white.
An eye for contrast involves watching for areas of intense light and dark in different parts of the image.
Scenes with texture and distinct focal points are also suitable for black and white landscapes.
Although you may want to shoot in RAW format and determine color settings later, it’s possible to configure most digital cameras to display the LCD images in black and white mode to give you a sense of how the contrast and light appear later in post-processing.
Using black and white mode might help your composition and help you think more creatively about what to shoot in monochrome.
One final perk of shooting in black and white is that it can hide poor lighting conditions.
No one knows the difference if the sky is overcast and gray in a black and white landscape!
Related Questions
What is the best natural lighting for landscape photography?
While filters can change the quality of the lighting outdoors, experienced photographers find that there some times of day are better than others for taking landscape photography.
Called the “golden hour”, it is best to shoot landscapes in the few hours right after sunrise or the few hours right before sunset.
The golden hour is best for shooting because the sun is lower in the sky and tends to be softer.
Unfortunately, those are not always the best hours for photographers. That’s where filters can help modify the light to produce quality images.
Can you use a DSLR camera to shoot landscapes in the rain?
It depends on the camera.
Some cameras have more weatherproofing capabilities than others.
Knowing your camera model and how weathertight the seals around the camera body and lenses are is essential.
Some cameras can withstand a fine mist of a waterfall but experience damage in a torrential downpour.
Other cameras might have trouble in any wet conditions. Regardless, if there’s a chance you may expose your camera to water during a shoot, you’ll need a rain sleeve.
Shutterbugs Behind This Article:
Amy S.
Photography Enthusiast
Brandon F.
Head Photography Nut
Thanks for sharing tips it will be really helpful for newbie to capture beautiful pictures .