Contents
Introduction
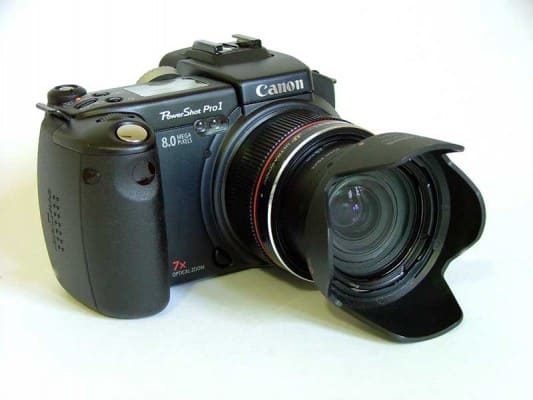
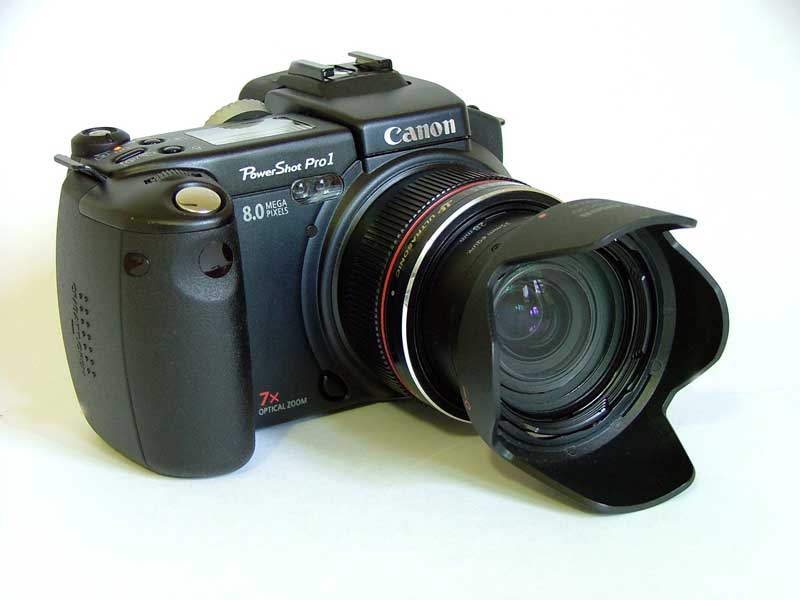
The Canon PowerShot Pro1 was announced back February 2004, and was subsequently made available to the Australian public a month later. As indicated by its name, the 8 megapixel camera is targeted towards high-end prosumer users, with features such as a bright built-in 28-200 L series lens, jog wheel/control dial, custom functions and flash hotshoe.
Major Features
- 8 megapixel sensor
- 28-200mm (35mm equivalent) L series lens
- Full manual controls
- Jog wheel
- Flash hotshoe
- 2 inch flip and twist LCD
- Black and White Informational LCD Panel
One question that many digital users ask themselves is that whether a digital SLR would be their camera of choice, if a compact camera that had all the features of a SLR camera existed. Well, with features such as these, Canon is evidently aiming to capture some of the SLR market share – offering almost everything a user could want in one package.
How did Canon do with this camera? Find out in the review.
Design top
Optics
The lens is definitely the biggest selling point of this camera, so let’s start with that. The Pro1 makes no pretense about being a professional quality L-series lens by having the trademark red stripe on its 28-200mm lens. The bright 2.4-3.5 aperture range is very welcome indeed, as it ensures that more light enters the lens. This can help to reduce the effects of camera shake especially at the telephoto end.
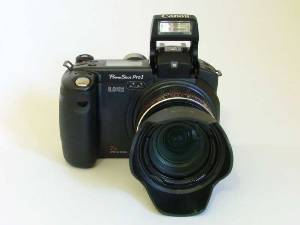
I think Canon have equipped this camera with a very useful zoom range. Landscapes and wide angle shots are managed easily with the 28mm, while the 200mm end has enough “reach” for applications such as sports. SLR users with a similar lens would normally find that it stayed on the majority of the time. Wildlife photographers would obviously want to have 400mm or 600mm, but you can’t please everyone.
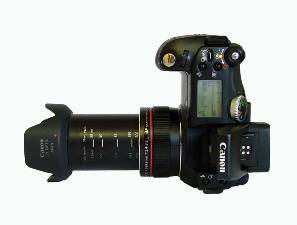
Zooming action of the Pro1 is driven electronically through a zoom collar on the lens barrel, which activates the zoom motors when twisted. Zooming from wide to telephoto end feels very deliberate and precise. It takes about 2 seconds to go from one end to the either, which allows a great deal of control. Activation is very responsive with no noticeable lag before the lens begins moving. However, because the zooming action is slow, if you give it a big twist, the lens may take some time to catch up. It does take some getting used to and while I would have preferred a mechanical type zoom, you do get used to it after a while.
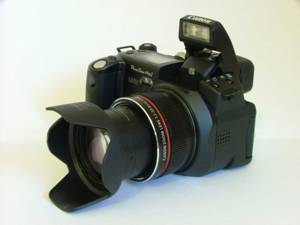
The lens itself is comprised of 14 elements in 10 groups, including 1 fluorite, 1 UD lens, and 2 aspherical lenses. The aspherical lens elements help suppress distortion and spherical aberration, while the Ultra-Low Dispersion (UD) and Fluorite lens elements assists in correcting chromatic aberrations in shots.
Imaging
The PowerShot Pro1 is equipped with a 2/3 inch primary colour filter (Bayer type) sensor with 8.0 effective megapixels. The sensor is purported to be manufactured by Sony – the same used in other eight megapixel giants such as the Sony DSC-F828, Konica Minolta DiMAGE A2, Nikon Coolpix 8700 and the Olympus C-8080 WZ.
Canon have included the latest DiG!C Image Processor which delivers improved picture quality, AF accuracy and processing speed, resulting in improved shot to shot times and higher quality output.
iSAPS Technology is an entirely new scene-recognition technology included on the Pro1. Using an internal database of thousands of different photos, iSAPS works with the fast DIGIC Image Processor to improve focus speed and accuracy, as well as exposure and white balance.
Build
The outside of the Pro1 is constructed mainly of high-grade black plastic which has a non-marking matt finish and appears to be quite durable. Selected portions such as the lens zoom ring are made of lightweight metallic alloy. I would have expected nothing less than a metallic tripod mount, and Canon did not disappoint.
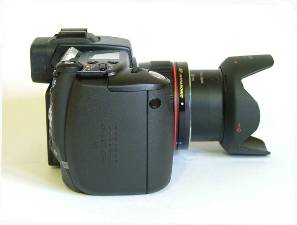
From the front, the first thing which catches your eye is the large lens which is impressive, compared to the tiny lenses found on most compact digital cameras. The front of the lens has a small thread for attaching the included lens hood, useful for blocking out stray sunlight when shooting outdoors. Just remember to remove it when using the flash, as it can cast a nasty shadow in your images. As with the G series and other similar cameras, the front ring can be detached and replaced with a filter adapter (included) and a conversion lens adapter.
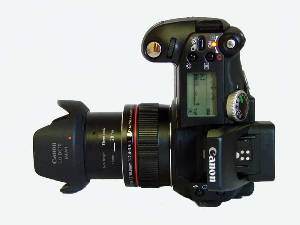
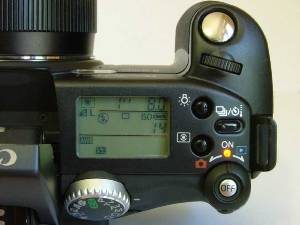
On the top of the camera, a hotshoe and flash unit is present as well as a black and white LCD panel. This is a nice touch, as it displays useful shooting information which is easily visible without having to bring the camera up to your eye. An orange back-light permits low light use.
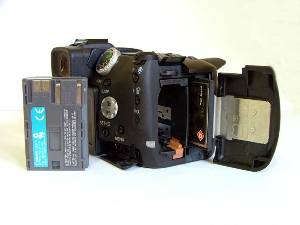
In terms of openings, the USB, DC In and Video out jacks on the bottom right of the camera back are neatly covered by a flip out plastic shield, which is very sturdy and protects these from dirt and the elements. On the right, a large plastic door opens to reveal the Li-Ion battery pack 7.4V 1390mAh and CompactFlash slot. The hinges look like they will stand up well to wear and tear, which is great in my books.
Controls
Shooting controls dominate the top right hand portion of the camera, including the on/off switch, shutter button and control dial / jog wheel. As we swing towards the left additional buttons can be found to turn the B/W panel illumination on or off, set the metering type and single shot/continuous drive mode. Set slightly back from the LCD panel, the mode dial sits at an approximately 30 degree angle to make it easier to turn using the thumb. The modes range from Auto, Programmed Auto, Shutter and Aperture Priority, Full Manual exposure and two custom functions. There are also Portrait, Landscape, Night Shot, Panorama Assist and Movie modes as well. On the far left of the top face, flash and macro mode buttons can also be found.
Buttons on the back are divided into two groups. The first group of controls next to the LCD screen include the function button which controls shooting settings, 4 way controller to navigate menus, the Set selection button and the Menu button. In recording mode, pressing up on the 4 way controller brings up exposure compensation screen, while pressing down accesses white balance functions.
The second group of controls sit on the far right and implement manual focus, auto-exposure locking, and the info button for hiding/displaying detail. Some of these buttons also serve a dual function in playback mode, indicated by blue labels. These include the jump, delete and note recording buttons.
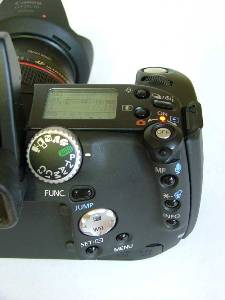
As you can tell, Canon have integrated as many external buttons for quick access as opposed to traversing cumbersome menus. The buttons on the Pro1 are the small black plastic variety, and have a nice tactile feel to them. I found them well laid out and all easily controlled by the forefinger on the top surface, or using the thumb for those on the back of the camera.
Display
The rear of the camera is dominated by the large 2 inch LCD screen with an anti-glare filter, making the screen quite usable outdoors. The screen itself is a swivel type, capable of traveling 180 degrees in a horizontal direction and 270 degrees vertically, which makes shooting from different angles (such as from waist height for macros) quite achievable. This LCD screen can also be folded away to protect it if one is planning to use the EVF as the primary display.
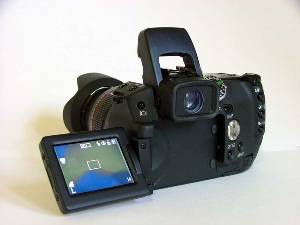
Above the LCD screen sits the electronic viewfinder (EVF) with a dioptre adjustment on the left side for eyeglass wearers. An EVF is akin to looking at a tiny computer screen that shows the exact same information seen on the LCD. In general, two aspects of EVFs take getting used to, especially when compared to optical viewfinders – the refresh rate which means that moving objects in the screen are slightly delayed (and sometimes display ghosting), and the graininess of the image due to pixels.
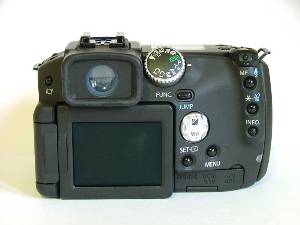
The EVF on the PowerShot Pro1 is one of the better implementations I’ve seen. It displays excellent detail, refresh rate is good, and the screen is sufficiently large that I would feel comfortable using it as a primary means of composition. Both the EVF and LCD show 100% frame coverage, which is excellent.
To the left of the EVF is a button which toggles between activating the EVF or LCD display on the back. Unfortunately, there is no eye sensing activation as seen on the Minolta A-series.
Usability top
In the Hand
The camera is styled very similarly to a SLR, with a chunky handgrip which provides a very comfortable hold for the right hand. The lens protrusion is another dominating feature of the camera, and the left hand wraps naturally around it. It feels very balanced when held with two hands, the left hand cradles the lens and the thumb and forefinger rests around the zoom collar. All the buttons area very easily accessible by the thumbs and right forefinger – everything feels very ergonomically placed.
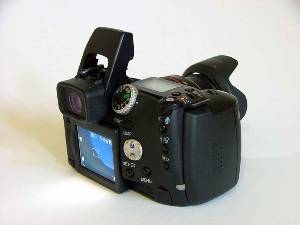
While it did feel larger than a consumer point and shoot, it was not excessively bulky, nowhere near the size of a digital SLR. At approximately 650 grams fully loaded, it is heavier than most cameras, though not a pain to carry around. In fact, among the 8 megapixel cameras mentioned at the start of the review, the Pro1 sits happily in the middle of the pack.
Recording Mode
When turned on from a cold start, the lens on the Pro1 extens in one and a half seconds and is ready to shoot within 2.8 seconds. While not the quickest, it does feel reasonably nimble.
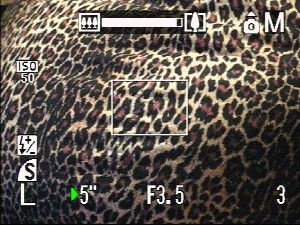
The Autofocus system is quick on the Pro1, with is focussing action driven by an Ultrasonic Motor (USM). In most cases, a lock is achieved in under half a second. Even at full telephoto, where most cameras struggle, the focus locks on in about ¾ of a second.
Only one autofocus point is provided by the Pro1. While this AF zone is quite large, some SLR users may be accustomed to having 7 or more AF points in the frame. With the Pro1, make sure you lock focus on your subject first before recomposing. In tricky situations — when working with a tripod for example — Canon allows you to move the AF point anywhere in the frame.
Manual focus is implemented very nicely in the Pro1. Pressing and holding the MF button while twisting the zoom collar controls the focus distance. The middle of the screen also shows an enlarged view of the image, making it easier to determine if the area is in focus. There is also a distance scale displayed on the right hand side. The zoom collar makes it seem very intuitive and almost becomes second nature when shooting in this mode.
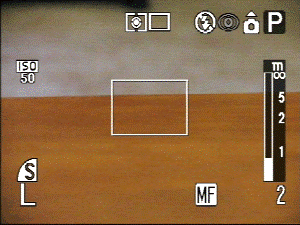
Similarly, shutter lag almost non-existent on the camera – assuming that you pre-focus by holding the shutter button halfway, images are captured immediately after a full press.
Continuous shooting
On the largest JPEG setting, the Pro1 was able to keep up a constant shooting rate of 1 image per second for 17 images before it ran out of internal buffer where the rate slowed to 1 every two seconds. This quite unimpressive for action shooters, and there is no form of burst mode either.
In RAW mode, the continuous shooting speed understandably drops to about one image every four seconds due to the large file sizes. Kudos to Canon though, for providing such a large internal buffer.
Shooting Aids
In shooting mode a lot of the information is displayed as icons around the boundaries of the screen. The left hand side shows the image quality settings such as ISO, size, compression and effects. The top edge metering and continuous shooting modes, flash modes, while the bottom right shows the number of shots remaining. When the shutter is half pressed, exposure information is displayed at the bottom of the screen. Similarly, when zoom is activated, the amount of zoom is show at the top. Further information such as EV compensation is displayed in the B&W LCD on the top of the camera.
Unfortunately, the Pro1 does not come with a live histogram in recording mode, or a grid overlay function. Histogram users will need to get used to analysing the scene manually and switching to playback mode after the shot.
Creative Control
Canon has equipped the PowerShot Pro1 comes with a full range of exposure modes, including auto, programme AE, aperture priority, shutter priority and full manual.
In Program AE mode, the optimum exposure value is calculated by the camera. You can also alter the aperture for example, and the camera will automatically adjust the shutter speed to compensate. However, the way in which this is done is unnecessarily trickier than most – you need to hit the AE Lock button first, then rotate the command dial/ jog wheel. Most cameras (including Canon DSLRs) omit the first step which speeds up the workflow.
In manual mode, the aperture or shutter speed is changed by the rotating jog dial with the forefinger. Pushing it in (imagine a push-button scroll wheel on a mouse) toggles between the two. Given that the Pro1 comes only with one scroll wheel, it is a neat way for handling this. Shutter speeds ranging from 1/4000 seconds to 15 seconds can be selected. A BULB mode is also available.
Scene Modes
The Pro1 comes with some pre-defined scene modes including portrait, landscape and night modes, which are accessed via the command dial. There is also a panorama stitch assist mode that displays the last image taken to help align the next image.
In addition to these, two custom setting slots are available on the command dial, allowing users to recall commonly used settings at a twist. Settings saved include: shooting mode (P, Av, Tv, M), manual focus location, zoom location and other such settings that can be accessed via the recording menu. Those accessed via the FUNC button (ISO sensitivity, effects, image size and compression, EV compensation) can’t be saved as a custom setting though.
Metering
In default setting, the Pro1’s evaluative metering does a good job of measuring the lighting against its database of scenes. In circumstances requiring absolute control, Canon supplies a centre-weighted average and a spot metering mode. With spot metering, the zone can be set to the centre of the frame, or linked to the AF point if it has been set off centre.
Overly bright or dark scenes can be compensated for using the Exposure compensation setting, from +2.0 to -2.0 EV in 1/3 EV steps. There is also an Auto-bracket function, which will automatically take 3 frames with different exposure settings (-0.5EV, ±0, +0.5 EV) – quite handy when you don’t want to take any chances with those important shots.
White balance
As well as the Auto and preset white balance modes (Daylight, Cloudy, Tungsten, Fluorescent, Flash) there are also two custom white balance slots to save specific settings – e.g. if you’re working in a studio. There is no white balance bracketing function though.
ISO Sensitivity
While shooting at ISO50 will usually produce smoother images and more vibrant colours, increasing the ISO sensitivity will allow picture taking in lower light. The images captured at ISO50 are very smooth and noise free. The Pro1 only allows selections between ISO50 and ISO400 though, which was surprising as other manufacturers commonly offer up to 800 or 1600 settings.
Movie Mode
While a digital camera is best suited to capturing stills, you may want to record the action and atmosphere of a scene on particular occasions. The Pro1 affords AVI recording with sound in three sizes (640 x 480, 320 x 240 and 160 x 120) although frame rate is only 15 frames per second the maximum length is only 30 seconds at 640 x 480 and about 3 minutes in the other modes. While you won’t be throwing out your handycam anytime soon, the movie mode records sound well, and is very fluid and of high quality.
Playback Mode
Activating playback mode from an off position takes quite a bit of time due to the large file sizes, but the image is displayed after approximately 4 seconds. Moving between images takes about 1 and a half seconds, which is again, a little slow in taking into account the 8 megapixel images. When the left or right buttons are held down, a progress bar appears which allows “fast forwarding” to a particular location in your image collection. There is also a 9 image view to allow users to quickly find a particular photo on the card.
Playback mode displays a good selection of information to the user, including image number, image size and compression used, date and time. Upon hitting the info button, more information is displayed, including the ISO sensitivity, capture mode (P, Tv, Av, M), exposure value and compensation, and white balance setting. A histogram is also shown beside the image which is very useful in identifying blown out highlights and shadow area in the image. The overexposed areas in the image also blink which is a good indicator.
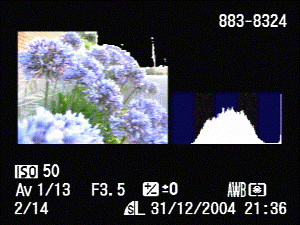
When viewing images, playback zoom is accessed by twisting the zoom collar and is very intuitive to use. The 10x zoom moves smoothly into the image and shows a very high degree of detail. In the bottom right, an image map shows the portion being zoomed in.
Camera Menus
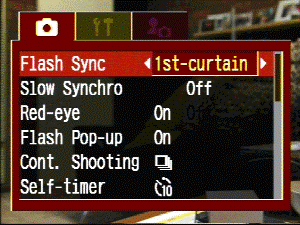
Camera menus are nicely laid out in the traditional Canon manner. The main menu features tabs which segregate recording/playback settings, camera settings and personalized settings (e.g. wallpaper and sounds). Moving through these is achieved using the 4 way scroller and selections are made using the SET button. Individual settings are accessed by scrolling down, and the value selection made by scrolling across. The menu colour scheme uses strong solid colours and short descriptive text which works well.
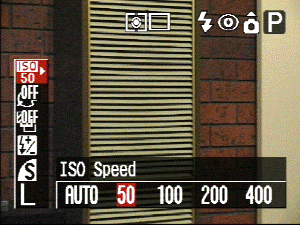
Pressing the FUNC button in record mode also brings up image settings such as ISO sensitivity, effects, image size and compression. Unlike the main menu, these are displayed as white icons. While these have short descriptive text accompanying each selection, I tend to dislike Canon’s scheme as they take a bit of guesswork to decipher initially.
Features top
Photographic
Macro
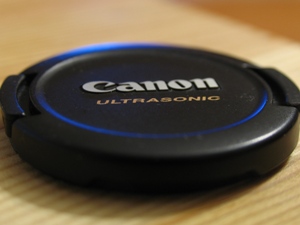
In addition to the standard macro setting, a Super Macro mode on the Pro1 allows objects to be captured up to 1 cm away. In practice, I found this mode a joy to use, especially on a camera featuring a super-zoom lens.
Flash
The internal flash has a range of up to 5m at wide angle setting, and about 3.5m at telephoto. The flash itself is quite strong with sufficient reach for indoor use, and the traditional Canon treatment ensures that colours aren’t too washed out.

Flash modes include 1st curtain and 2nd curtain flash. The default 1st curtain setting fires the flash at the beginning of the exposure. The latter mode does the opposite, which “freezes” subjects towards the end of the exposure, resulting in things such as light trails leading the object rather than trailing behind.
Interval Timer
The Pro1 also comes with an Intervalometer, which basically allows shots to be taken automatically at predefined intervals. Images can be recorded at full size which opens up a lot of potential for creative photography.
Low light / Night Exposures / Noise reduction
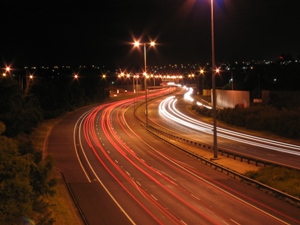
While the Canon did not include an AF assist lamp on the Pro1, I found that shooting indoors and in focusing in dim light was not a problem. Night exposures were also handled well by the Pro1 – I was able to get some nice 10 second exposures at my test spot over the freeway bridge. I noticed that the Pro1 employs dark frame subtraction is used to remove hot pixels which commonly plague long exposures. This works by taking another shot but with the shutter closed after the original shot. Any hot pixels which appear on the second frame will then be subtracted from the initial image via internal processing.
ND Filter
The Pro1 has an interesting ND filter mode which is accessible through the menus – this replicates the effect of “stopping down” the lens or reducing the amount of light coming through the lens, so that a slower shutter speed can be used in bright light. This feature can be quite helpful if attempting to obtain the blurry water effect if shooting on a sunny day.
Battery Life
The PowerShot Pro1 comes with the BP-511A rechargeable Lithium-ion battery pack, rated at 1390 mAh – the same type used with Canon’s DSLRs. Don’t expect the same battery life though, due to the fact that Pro1 draws power to for the EVF or LCD whereas the DSLRs use an optical viewfinder. Canon claim that over 400 shots can be taken on a single charge, but in practice, expect less.
Memory Usage
A paltry 64mb card comes supplied with the camera, but let’s face it – enthusiasts wouldn’t be happy short of a 1G card. This is well justified too – the file sizes weigh in at an average of 7 megs for RAW shots, and an average of 3.5 megs for large JPEG images. At that rate, you’ll get a touch over 135/270 shots on a 1G card, so plan to take lots of cards or a portable storage device on long trips.
In 640 x 480 movie mode, the camera will chew up approximately a megabyte per second, but don’t worry – you can’t take clips longer than 30 seconds anyway.
Photo Quality
In terms of sharpness, the L series lens on the Pro1 definitely delivers some razor-sharp edges and subject detail. Combined with the small aperture and larger sensor size, some great background blurring was able to be achieved – a feat that’s quite hard on consumer digicams.
Barrel distortion was slightly evident at the wide end, and surprisingly, the telephoto end displayed a touch of barrel distortion, instead of the usual pincushion distortion. Minute vignetting was visible on some shots, though not very noticeable. A few backlit shots did display some blue and purple fringing as well, although the majority of the images did not exhibit this behaviour.

Colour reproduction was excellent, with rich greens and blues accurately captured in scenery shots, and flesh tones being correctly exposed.
At ISO50, the images were very smooth and noise free. JPEG compression artifacts and jaggies are kept to a minimum, and noise is not very evident in the test shots. Above ISO100 is a different story, however. Random noise is evident and at ISO400, daylight images are almost unusable, which was disappointing.

Overall, the PowerShot Pro1 captured some very well exposed, pleasing images with great colour reproduction and image quality.
Summary top
Positivies
- Very usable wide angle to telephoto range
- L-series lens, with great minimum aperture range
- High image quality and colour reproduction
- Nice large EVF with good refresh rate
- Large twist-out 2 inch LCD with good resolution
- Electronic zoom collar and nice manual focus implementation
- Flash hot shoe, wireless remote, lens hood and accessories
- Generous internal buffer for continuous shooting
- Features such as exposure bracketing, intervalometer
Negatives
- Slower than average continuous / shot to shot times
- No AF assist lamp
- Movie clips limited to 30 seconds only
- Noisy images at higher ISO settings
- No White balance bracketing
- No histogram in recording mode
Recommendation
Canon have designed the PowerShot Pro1 from the ground up to attract experienced photographers who know what they want out of digital photography — the great zoom range, L-series lens, creative controls and professional construction add to the appeal. Canon’s flagship prosumer camera exudes quality, feels great in the hand and handles well. While it has no trouble in producing rich, contrasty and sharp images that have a lot of detail, it is let down by sluggish shot to shot times and noisy images at the higher ISO settings. In optimum conditions the Pro1 can definitely hold its own, but with the price envelope of Digital SLRs continually dropping and features such as image stabilization being offered from other 8 megapixel contenders, the Pro1 certainly faces some stiff competition.
| Design: |           (9.5/10) (9.5/10) |
| Usability: |           (9/10) (9/10) |
| Features: |           (8/10) (8/10) |
| Image Quality: |           (9/10) (9/10) |
Have your say: feel free to leave any feedback or comments.
As I say to all my family, friends and readers – reviews usually comprise of one person’s opinion. Do yourself a favour by visiting your local camera shop and try the camera out for yourself. If possible, bring a memory card with you and take home a few test shots for closer inspection on your own computer. This will give you a better idea whether a camera is suited to your needs.
I make reborn babies as an art form and i found the pro 1 to excel in showing my buyers of my babies to be an excellent tool for clarity