
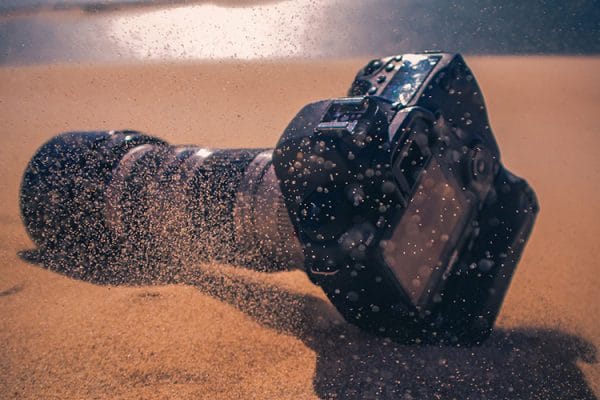
Whether you’re just pulling your first DSLR camera out of the box or you’re a seasoned photographer, one of the most important things you need to know is how to protect your camera gear. It’s especially important to know how to avoid damage from dust, sand, and dirt if you plan to take your camera high-risk locations like the beach.
It’s a great question for every photographer to know the answer to: How do you protect your camera from dust and sand when shooting somewhere like the ocean or the beach? First, know the risks of what dust and sand can do to your camera. Second, take steps to reduce the risk, and lastly, know what to do if your camera comes in contact with dust, sand, or moisture. All of this is important knowledge to have to keep your equipment safe and avoid big bills at the camera repair shop.
Is it Safe To Take A Camera To The Beach?
If you ask an experienced camera repair professional if it’s safe to take a camera to the beach, they’re likely to answer both yes, and no. The answer might be no, because the risk of damage is high when taking your camera to an environment like the beach where there’s sand, salt, and moisture to contend with. The answer might also be yes, because if you know the risks—and do your best to try and prevent damage—most photographers can safely shoot without harming their equipment.
What damage can dust and sand do to your DSLR camera?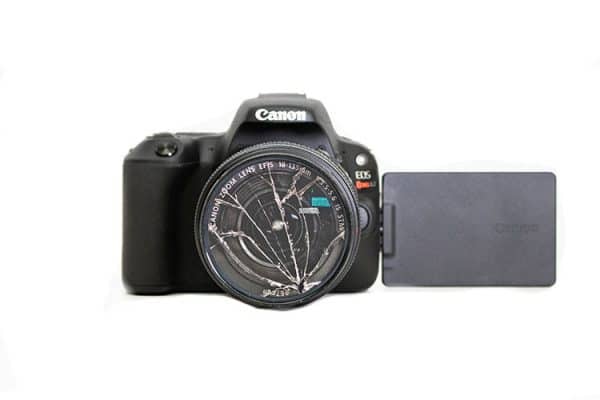
Many people think that the biggest risk to a camera at the beach is water. Even if the camera never gets near the ocean, the more problematic issue is dust, sand and debris. When these get near your camera, there are lots of things that can go wrong:
• Scratches to the lens or sensor surface.
• Blockages in the gear units for zooming or focusing the camera.
• Damage to internal electronics if debris enters the camera case.
• Clog buttons and dials on the exterior of the camera.
• Damage to batteries, memory cards, and USB connections.
In addition, repairs for dust and sand damage can be incredibly costly. The entire camera must be dismantled, cleaned and any parts that were damaged must be replaced. This is an expensive fix if you need to send it back the manufacturer. It’s also not often covered by just the standard camera warranty. In order for sand and dust damage to be fixed free of charge you typically need to pay for extended damage protection.
The first thing to know to protect your camera from dust and sand is to know if your camera is weather sealed and how well-protected it is. Not all cameras have the same level of protection against the elements. If you know you’ll be using your camera at the beach regularly, consider a camera manufactured for water and sand exposure. There are several “tough” camera options on the market that can withstand some exposure to the elements. Otherwise, you’ll need to take some of these extra precautions to keep your camera safe at the beach.
Contents
14 Ways to Keep Your Camera Safe at the Beach

1. Don’t bring it. Choose a cell phone instead.
It may be a moot point, but if you want a 100% full-proof way to prevent damage to your camera at the beach then leave your camera at home. There’s no guaranteed way to avoid dust and sand in your camera, so if it’s really important to keep it safe, you’re better off bringing a used model or your cell phone camera along instead.
2. Carry Your Camera and Camera Bag. Don’t set them in the Sand.
The best way to avoid dust and sand in your camera is to avoid any contact with the ground. Carry your camera at all times and never set it directly in the sand. It’s even too risky to set your camera out on a towel while you’re not using it. At any time, sand can accidentally be kicked or blown onto it.
The same rule applies to your camera bag. Avoid setting it directly on the ground or in the sand. Try your best to avoid getting sand in or on the outside of the bag. The fine particles are difficult to remove and can end up causing damage to your camera later on.
3. Avoid Touching Your Camera With Dirty Hands.
If you’ve stopped to have some fun in the sand or in the water, you’ll want to avoid picking your camera back up without first washing your hands. Dust and sand on our hands can be easily transferred into the buttons on your camera or into the gear parts of your lens as you adjust the zoom or focus. The extra few seconds it takes to rinse off might save you hundreds of dollars in repairs later on.
4. Keep camera equipment away from Sunscreen and Bug Spray.
The “always wash your hands” rule also applies if you’ve applied sunscreen, tanning oil, or bug repellant. You’ll want to wash your hands before you use your camera if you’ve been in contact with any of these items. Sun lotions, tanning oils, and bug repellants can contain harsh chemicals that will cause damage to your camera. The greasy film left behind from sunscreen can be difficult to remove it ends up on lenses or your camera buttons. The harsh chemicals may cause corrosion of parts as well.
Be sure that if you’re using spray sunscreen or bug repellant that you move far away from any camera equipment. Overspray is just as harmful and difficult to remove from lenses and the camera body as transferring it from your hands.
5. Cover your Camera with a Rain Cover or Waterproof Housing
If you know you’ll be taking your camera to the beach to shoot, the easiest and most affordable way to protect the lens and camera body from dust and sand is to use rain gear or a waterproof housing. Even if you don’t intend to take your camera near the water, both a rain cover or waterproof case will reduce the amount of debris that reaches the camera.
If you didn’t remember to pack a rain cover, another option that will work in a pinch is to use a plastic zip-top bag or plastic grocery bag. Place the camera body in the bag and make a small opening to push through the end of the lens. Slide your hands in the bag and use the camera under the protection of the plastic. It will not protect as well as a fitted rain cover or a waterproof case, but it should keep some debris off the body and lenses.
6. Avoid Lens Changes 
Another critical thing to remember if you’re taking your camera to the beach, if at all possible, is to avoid lens changes. Any time you expose the lens and camera sensor to the elements, you’re at risk of damage from particles getting inside the camera body. Decide which lens you plan to use before you leave the protection of your vehicle for the best chance of avoiding dust and sand damage.
7. Change Lenses Out of the Wind
If you absolutely must swap lenses during a photo shoot at the beach, you’ll want to at minimum find a place to swap lenses out of the wind. Go to a picnic shelter, your vehicle, or make a wind barrier with your body. Work as quickly as possible to avoid the amount of time your lens and sensor are exposed to the elements.
Be careful though, quickly trying to swap lenses to avoid the wind is one of the common ways a lens get dropped. There’s nothing worse than rushing to avoid some dust particles only to drop the lens right into the sand. If needed, use a friend as a second set of hands to hold the lens caps and put the protective case back over the sensors.
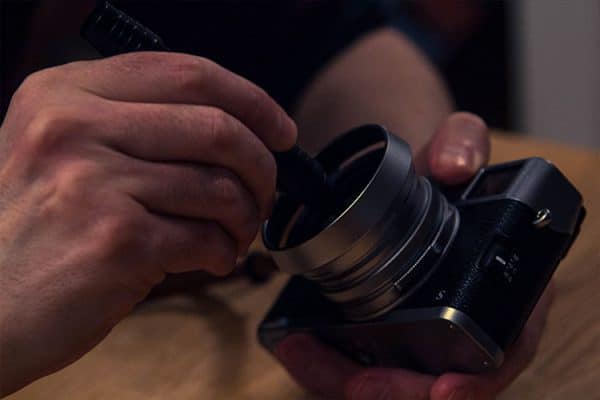
8. Protect Your Lens with a UV Filter
While there’s some debate among professional photographers about how much protection lens filters provide, if you plan to use a favorite lens in less-than-ideal conditions, you may want to add a UV filter. Filters are far less expensive to replace than the lens if scratched by dust or sand. It’s still possible to experience sand and moisture damage if the filter doesn’t create a weatherproof seal with the front of the lens. However, some UV filters come with waterproof coatings on them for added protection against water and debris.
The same notes apply to changing lenses as they do for changing filters. If you don’t have to change them on the beach or in the wind, avoid it. Always make sure your hands are clean and dry before you handle a filter. And finally, if there’s sand or debris on the rings of the filter, clean them carefully before you attempt to attach the filter to the lens. Not removing it may result in damage to the filter or the lens.
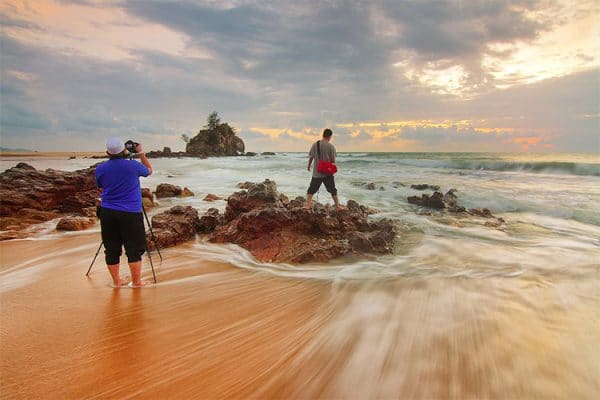
9. Use a Tripod
Another option to consider to avoid inadvertently dropping your camera in the sand during a beach shoot is to use a tripod. Attaching your camera tightly (and using a rain cover to protect both the tripod and camera) can offer more protection from the elements, especially if you’ll be shooting where the camera may be subject to spray from the ocean or a waterfall. When purchasing a tripod, make sure that its capacity can hold both the weight of your camera body and your heaviest lens combined.
10. Dry Off Any Moisture Quickly
If you happen to experience a mishap at the beach and a bit of rain or spray ends up on the lens or camera body, but sure to address it quickly. Allowing water droplets to dry on the lens can result in water spots—or in some cases—tiny mineral deposits that adhere to the lens glass. These deposits are difficult to remove later, and can even put your lens at risk for scratches as you try and remove the spots. It’s best just to be proactive and immediately address any moisture that your camera comes in contact with.
11. Carry a Blower (Don’t Wipe!)
Along with drying up moisture right away, you’ll also want to address sand and debris as soon as possible. The important thing for dust and sand is to always avoid wiping the lens. As tempting as it may be to grab the end of your t-shirt and rub the dust off the glass, it’s a big no-no in the camera cleaning world. As you wipe dust away, you’re at risk of leaving tiny scratches on the glass from grinding in the sand and dust particles. Even if you’re not able to see the scratches, they can impact image quality and the functionality of your lens.
Instead, you’ll want to carry an air blower in your camera bag to quickly clean lenses and the sensor. These specially designed dust-removal tools use are the most efficient way to keep your lens clean during a shoot.
12. Clean Your Gear Right Away
While a dust blower can be a good tool to use in a pinch, it doesn’t substitute for a solid cleaning of your camera gear when you return from a photo shoot at the beach. Cleaning all your gear (lenses, camera body, filters, camera bag interior and exterior, tripod, etc.) is the best way to avoid dirt and dust later transferring to the lens. Cleaning right away when you return, will avoid the ‘out-of-sight-out-of-mind’ scenario where you intend to clean the camera at a later time, but don’t end up bringing it back out until right before the next shoot.
The best habit is to spend a few minutes giving your camera a good cleaning each time you finish using it. If you charge for your photography services, incorporate the time it takes to clean your gear into your sitting fee so it doesn’t feel like ‘lost’ or wasted time.
13. Purchase the protection plan for your equipment
Another piece of good advice for photographers who will regularly shoot in situations where dust, sand, and moisture are factors, is to consider purchasing an extended protection plan for your camera equipment. Offered by many manufacturers and camera retailers, these extended warranty plans come in all different levels of coverage and types of repair services. If you know there’s a high probability you might end up with dust or moisture in your lens or camera body, it may be worth paying a bit more upfront for the peace of mind later on.
You may also want to check with your homeowner’s insurance provider about camera coverage. Some policies can be adapted to include repairs and replacement costs for expensive camera parts and equipment. If you are considering that beach wedding photography start-up, extra insurance coverage is the way to go.
14. Protect Your Gear From Being Stolen
One final note about taking your camera to the beach: While it’s not likely a reason your camera will be damaged by sand and water, one of the risks worth noting is that camera equipment can be easily stolen if left unattended at the beach. You may think that your gear is safe while you go for a swim, but if left unattended or out in the open, there’s a chance your equipment will find a new owner.
Make sure that when you’re at the beach that you keep an eye on your camera, camera bag, and other gear at all times. If you know you’ll be distracted or need to leave the gear behind, ask a friend to keep watch over it until you return. Better yet, take your photos and then return the gear safely to your locked vehicle while you enjoy the beach.
What to do if your camera is exposed to dust and sand?
After a day of shooting at the beach, it’s best to immediately clean your camera when you get home. Following these steps can help you prevent dust, sand and any salty residue from lingering on your camera or in your camera body.
1. Wipe down the camera body with a microfiber. The first step to cleaning your camera is to wipe down the exterior of the camera. Clean off any visible moisture or large pieces of debris using a soft, microfiber cloth. Do not wipe the glass surfaces and be careful on the eyepiece and LCD screen areas to avoid dragging dust across the surface and scratching it.
2. Use a dust blower to remove dust particles from the lens. Next, use a squeeze-type dust blower to blow away large, loose pieces of dust and sand. Use short puffs of air and try to blow air away from the equipment to avoid any dust flying back into the lens.
3. Use a soft brush to clean out debris from the lens. 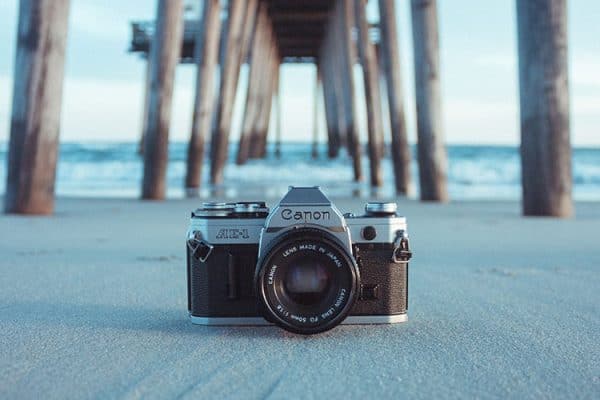 Once you’ve blown out large dust particles, you’ll now want to go back into the lens with a soft brush to remove all fine particles of dust, sand and debris. Don’t apply pressure, simply flick the brush around the surface of the lens. If you dislodge a large piece of dust, you can always go back to using the dust blower to remove it.
4. Clean the lens glass. Once you are certain that all debris is removed from the lens surface, you can deep clean the lens with a moistened lens tissue. This is not always necessary but helpful for any residue, oil or smudge marks that may remain on the lens glass. This should only be used if needed as repeatedly using lens towels can harm the manufacturer’s coatings on the glass.
5. Clean the camera body, LCD screen, and buttons. Next follow the same steps as above to clean the camera body, LCD screen and buttons. Do a thorough wipe down with a towel, then use the dust blower to remove any large particles of dust off the sensor. Avoid blowing dust directly into the camera body as this can actually force more particles into the interior components. It’s also a good idea to clean the camera body with the lens mount facing towards the floor to avoid dust from falling back in.
A few other tips to consider when cleaning your camera:
• Most manufacturers do not recommend that you attempt to clean the camera sensor without professional equipment. There are videos and tutorials for how to do it online, but given the possible damage to the entire camera, we recommend you have the sensor professionally cleaned.
• Unlike other electronics, when cleaning a camera you should avoid using compressed air. Cameras are more sensitive than keyboards and computer screens. Compressed air can inadvertently blow more dust into the body of your camera and it can also blow with so much force that the particles scratch the lens or sensor surface.
• If you’ve gone to the work of cleaning your camera, make sure you clean your other accessories as well. Filters and lens hoods should be carefully cleaned for debris and dust. Occasionally you should also remove the camera strap and be sure it’s free from dust and dirt.
• Finally, you may wish to consider a professional cleaning from time to time. If you know you had significant salt water or sand exposure, a professional camera cleaning at your local retailer will be the best insurance policy that the damage is contained. You may spend extra for it, but consider it a worthy expense over having to replace broken equipment.
What to do if your camera falls in the water?
While it’s cringe-worthy to just think about a camera floating in the ocean, we know it’s happened before and will happen again. If despite all the best caution you happen to drop your camera into a body of water, there are some steps you can take that may increase the likelihood your equipment can be saved.
Here’s what you should do if your camera gets wet:
1. Immediately respond. Don’t panic and watch your camera sink to the bottom of the ocean before you attempt to retrieve it. The faster you can get your camera back out of the water, the better chance you have of it surviving. If it’s just a few seconds of exposure, it’s possible that some parts of the camera body will remain dry.
2. Switch off your camera. If your camera was turned on when you dropped it, immediately switch it off. The worst damage to the camera can come from water mixing with active electronics in the camera. Shutting off power reduces the chances you’ll fry them.
3. Remove the memory card. The next most important step you’ll want to take is to salvage the images you’ve already taken. If you drop your camera in the ocean on the last day of a dream vacation, you risk not only losing the camera but also risk losing the memories from the entire trip. Memory cards tend to be fairly water resistant, but you’ll want to make sure that you quickly remove it from the camera body and dry it out completely to save the images.
4. Remove the batteries. Take out the batteries next and set them somewhere to dry out with good ventilation. There’s a chance that the housing on the outside of your battery pack is water-tight and the battery will continue to work if dried out completely.
5. Check for signs of water. The next step is to turn your camera over and look for obvious signs where water may have entered the camera. Only take the lens off if it’s clear that no water has entered the body and there’s no more water on the outside of the housing. You don’t want to risk it until the outside of the housing is completely dry.
6. Wash Your Camera. If your camera has been exposed to salt water, you’ll want to make sure you immediately wash your camera (it’s already wet anyway!) to avoid corrosion. Salt and other minerals in water can create havoc for lenses and camera components if any residue is left.
7. Dry It Out with Rice. The reason rice continues to be listed among the strategies to dry out soggy electronics is that it’s a trusty method. Open up your camera’s compartments and place your camera in a sealed container of rice. Let it rest for several days, allowing the rice to pull the moisture from out of the camera. Just be sure to keep the sensor covered so no grains of rice end up in your housing.
Another option if you’re concerned about water damage, is simply to turn the camera off and immediately take it to a camera repair location. If your camera is under warranty or you’ve paid for extended care protection, you may also need to contact the manufacturer. The tips above aren’t a guarantee that your camera will continue to work, but are some strategies that might increase the likelihood.
Related Questions

How do I protect my camera from the sun?
One more factor you might need to address when taking your camera to the beach is protecting it from the sun. Unfortunately, most cameras are black, the worst color for sun-soaked settings. The biggest issue when cameras are out in the sun is overheating. A good rule of thumb is that if a small child was likely to overheat in the conditions without sun protection, so is your camera.
So what are ways to protect your camera from overheating? The best way to prevent your camera from overheating is to minimize sun exposure. Whenever possible, shoot from a shady spot, use an umbrella, or rotate between a few different cameras. If these aren’t an option, you can always bring an ice pack (sealed in a zip-top plastic bag to prevent moisture exposure) and place it in your camera bag to bring the temperature down.
Can you use a DSLR camera in the rain?
It depends on the camera. Some cameras have more weatherproofing capabilities than others. Knowing your own model and how weathertight the seals around the camera body and lenses are is important. Some cameras can withstand a fine mist of a waterfall, but will experience damage in a heavy downpour. Other cameras might have trouble in any type of wet conditions.
Regardless, if there’s a chance you may expose your camera to water during a shoot, you’ll need a rain sleeve. One-time use only sleeves are affordable and easy to pack in your camera bag. If you’re caught without one, follow the tips above to dry out your camera if it ends up exposed to moisture.
How do I protect my DSLR when shooting in the desert?
Just like taking your camera to the beach, there are some things you’ll want to consider before your next photography shoot in a desert scene. While some cameras are built to withstand elements, the dry, hot and sandy conditions of desert scapes can be particularly hard on cameras. There are some steps you’ll want to take to best protect your camera from these elements.
First, cover the camera whenever possible. In the desert, you won’t need to worry about moisture, so you’re better off choosing a camera cover that can deflect some of the heat. Space blanket material that’s designed to shield from heat can help avoid issues with the sensitive electronics in your camera body overheating.
Along with covering the camera, you’ll also want to keep an eye on the temperature of your camera gear. Lenses and sensors are designed with specific temperature points in mind. Too hot and your camera may overheat. Not only are you not able to continue shooting in the moment, but you’re also risking damage to the camera over time. Keep the gear in the shade whenever possible, or use ice packs and fans to keep things cool.
Finally, you’ll want to make sure that you maintain an aggressive cleaning schedule for your camera gear when shooting in desert settings. It’s likely that you’ll end up with dust, sand, and other debris in your lens from the hot and breezy conditions.
Is there a lock/motion activated alarm that I can buy for my camera case?
You can use one of these from Amazon: https://amzn.to/3tsl1bu
Some good suggestions. However the article doesn’t mention another big risk to cameras at the beach – salt air.
As a long time Floridian, I have seen cameras, eye glasses, car windshields, etc. coated with a surprising layer of salt & humidity surprisingly quickly – even an hour or less depending on conditions.
I suggest considering adding suggestions for protecting cameras against this, and cleaning this if/once it happens, as this is a frequent occurrence in my experience.