Whether photography is a hobby or you have a goal of making it a career, you’ll want to learn how to combine flash lighting with continuous lighting. By changing a few small aspects of your lighting, you can see a significant change in the quality of your shots. As you get more comfortable with photography and begin to try different things, you might have some of the same questions about lighting techniques that I did. Which type of lighting is better? Can you use continuous lighting and flash together?
So, is it possible to use continuous lighting and flash lighting at the same time? Yes, you absolutely can use continuous lighting and flash lighting together to great effect. When used in together, your images will have sharp areas captured by the quick flash surrounded by blurred areas captured with the continuous lighting. Combining the two types of lighting can lead to some very artistic shots that give a distinct feeling of movement while still capturing the sharpness of one area of your subject.
Photos that combine continuous and flash lighting are so expressive and artistic that they seem like something only an expert photographer could do. However, the basic technique is something that even a novice can master. Once you understand the kind of images you can capture with each type of lighting on its own, you’ll be ready to combine them in an endless number of ways. One of the most intriguing aspects of playing with lighting is the infinite number of possibilities. Whether you’re a beginner or a seasoned expert, you’ll never run out of creative combinations to capture dramatic new shots.
Contents
Continuous Lighting: When, How, and Why You Use It
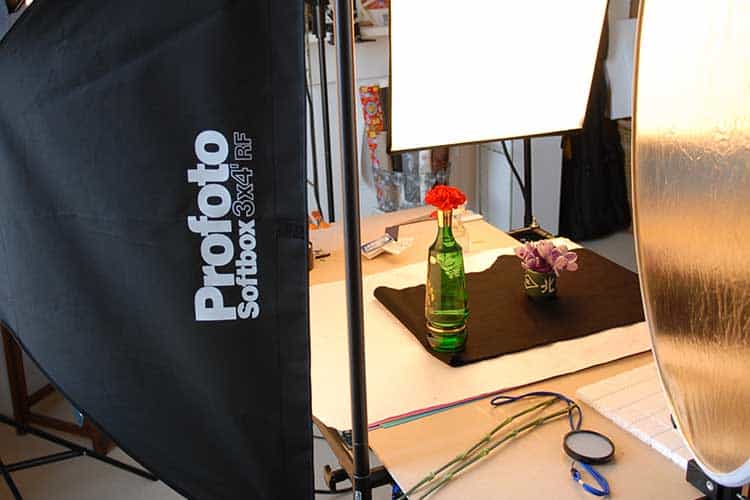
Continuous lighting is any source of light that you can turn on for an extended period of time. It can be something as large as a softbox or as small as a flashlight. It’s easy to get creative with continuous lighting, even if you’re on a budget because these lighting options are endless and can be very inexpensive. Really good flash lighting tends to be a little more pricy.
Since flash lighting is so powerful, it can be challenging to control in low-light situations. You won’t know exactly how your photo will turn out until after you’ve taken it. By the time you adjust your camera, you may have missed the shot. When you take a shot with continuous lighting, you know exactly how it’ll look. This type of lighting is easy for beginners to use because it requires less adjustment. To use continuous lighting you just set out your light source, look through your lens, and adjust the placement of the light as needed.
Continuous lighting is not as powerful and bright as flash lighting, so you often need to decrease your shutter speed to get your desired amount of light in the photo. However, decreased shutter speeds introduce the potential for blurring in photos. Unintended blur is a major downside of continuous lighting that can be challenging to control. You can try to mitigate unintended blur by adding additional light so you can increase your shutter speed, or by increasing the aperture on your camera to let in more light. If you still struggle after tweaking aperture and shutter speed, you can try using a tripod.
Photos taken with continuous lighting may end up with less vibrant highlights and darker shadows. Depending on your goal, this may be exactly what you want. Continuous light can be a great tool for portrait photography because it lends itself well to creating a softer look.
Another advantage of using continuous lighting is that it’s much easier to change the temperature of the light. Flash lighting is typically cool in temperature and although you can purchase filters, they’re sometimes more expensive and your options are less plentiful than with continuous lighting. Because the world is full of continuous light sources, your options for changing color or temperature are endless and more affordable.
Flash Lighting: When, How, and Why You Use It
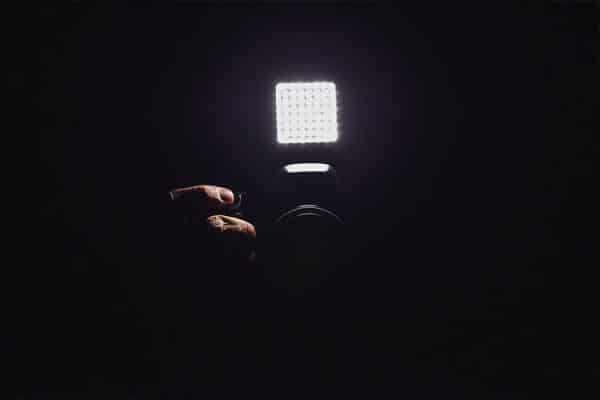
Flash lighting is a type of lighting that only lights up when you initiate it and lasts a very brief time. Some varieties of flash lighting have a feature that allows them to be turned on continuously, making them a bit more cost efficient than single-function flash lighting.
Some photographers prefer flash lighting over continuous lighting because it’s extremely portable. You can take a shot anywhere, anytime, without setting up multiple sources of light. Knowing how to adjust your camera so that your shots aren’t blown out by the flash takes some time to master, but once you have it, it can be seamless and efficient to capture great shots. Beginners may favor continuous lighting at first, but flash lighting is worth mastering because it has unique applications that are just not possible with continuous lighting.
Flash lighting is superior to continuous lighting for capturing crisp images of subjects in motion. It’s so effective that it can capture things you can’t see with your naked eye, like individual water droplets coming off a jumping fish. By increasing your shutter speed, you can stop time and capture details that continuous lighting would obscure.
In studio shoots, flash lighting can create more vibrant highlights on your subject’s face. Whether this is better or worse than continuous lighting is subjective and entirely dependent upon the goal for your photo.
Flashes sometimes come with the option of controlling multiple settings. This can be both a positive and a negative. More complicated tools present more opportunities for malfunction, but they also give you more options to be creative.
Combining Continuous and Flash Lighting

The combination of continuous and flash lighting can lead to some extraordinary photos. When it’s set up correctly, your continuous light source will capture motion in your image, and the flash will capture a crisp image.
To combine the two types of lighting, first, decide where in the shot you want motion and where you want crispness. For example, you may want to capture a sharp image of your model’s face, but movement in her hair or her dress. You’ll set your continuous light to point where you want motion, and your flash to point where you want definition. If you want to capture hair movement, consider positioning the continuous light source behind your model to illuminate her hair without illuminating her face.
It’s very important to keep your continuous light source away from the area you want your flash lighting to capture. When you mix these two kinds of lighting, you’re going to be using a slow shutter speed. If your continuous light is overreaching and hitting your model’s face, that lighting will catch any motion on her face by the time your shutter closes. This negates the effect you’re trying to create, which is a defined face.
You’ll determine the speed of your shutter based upon the amount of blur you want to capture. The slower your shutter speed, the more blur you’ll get. Your shutter speed will have no effect on what your camera captures from the flash because it strobes so fast, but it will affect how much light is let into your lens from the continuous light. That’s why it’s essential that your continuous light not shine where your flash is pointed.
In order to fully control the light that hits where your flash is directed, you may want to create an environment where you can completely eliminate all ambient light. If you’re seeking a lot of blur and intend to have a very slow shutter speed, you’ll want to eliminate any light that may affect where your flash is directed.
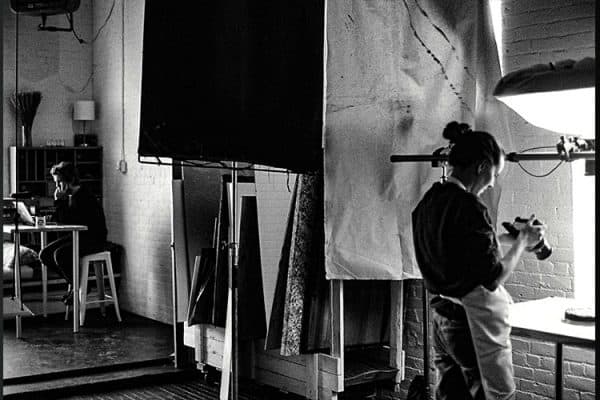
If you’re not seeking as much blur and your shutter speed will be a bit faster, it’s not as essential that you control 100% of the lighting in your setting. You can impact lighting incrementally as needed by placing black backdrops or panels to absorb continuous lighting that’s going astray. Anything you can do to stop continuous lighting from spilling into unwanted areas of the photo will serve to increase the sharpness.
Creative Additions to Enhance Your Shots
Once you’ve figured out the basics of mixing continuous lighting and flash together, you can start to get creative. An easy way to create some extra blur is to move the camera slightly after the flash but before the shutter closes. You can also try having your model move after the flash to create a ghost-effect.
If you’re not shooting in a blacked-out studio, you can take advantage of continuous light to play with aperture. In addition to definition and movement, you can create images that also have depth of field. If your studio is completely darkened though, there won’t be anything in the background to capture so aperture changes will be less impactful.
Depending on what kind of a look you want to make, you can choose to either match the color temperature of your lights, or you can contrast them. Since flash lighting is often cooler, you can play with changing the color of the continuous light to create different moods.
You may work with different amounts of continuous and ambient light to see how it affects photos. There are also endless variations of changing your shutter speed and amount of light to get different amounts of blur and different shapes.
You can get as dramatic as you like with this lighting combination. You can add smoke machines and fan the smoke into the frame. You can use a fog machine to do the same. You might even try playing with water droplets in the background.
Try bouncing your flash or continuous light off of different colored reflective objects. You may even choose to have your model wear reflective or silky fabrics to reflect more of the continuous light. You could then add a fan to cause additional movement of your model’s hair or clothing.
The creative combinations are infinite. Once you have the basics down, you could spend an entire photography career just playing with these two types of lighting and adding various other elements to create an endless stream of unique shots.
Combining Lighting to Enhance Low-Light Photography

One thing we haven’t touched on yet is that combining continuous and flash lighting can be a pragmatic way to enhance low-light photography. This strategy can be particularly useful for beginners or anyone who struggles to perfect flash photography in low-light. Dim lighting is challenging when you want a crisp, clear photo but don’t want to use a tripod. If you’re unable or unwilling to use a slow shutter speed, you can try adding some continuous lighting to your setting. This extra light will allow you to increase your shutter speed so you can capture detailed images without being tethered to a tripod.
Related Questions

What’s the difference between a strobe and a speedlight? A strobe is usually more powerful than a speedlight, producing as much as two times the light. Also, the strobe recycles, or recovers, from use more quickly than a speedlight.
How do strobe lights work? Strobe lights work just like regular camera flashes and speedlights but are more powerful. Also, they fire more quickly than a speedlight and can be re-fired right away.
Do you need a speedlight flash? A speedlight is just a flash that can be taken off camera to be positioned wherever you want or need it for a shot. You don’t have to have a speedlight, but it’s a tool that many photographers choose to use.