Did you know that 1 out of 3 photos taken around the world is a selfie? Selfies are practically essential to our lives, documenting where we are or how we look. Chances are, you’ve taken at least one selfie in the past few days; I know I have. Maybe it was just a quick selfie because you looked cute, or maybe you are traveling and wanted a selfie with a monument in the background.
Contents
What does a selfie light do?
Selfie lights are exactly what they sound like; they are a light to help you take selfies. Sometimes, the lighting around you just doesn’t cut it. To combat this, you can use a selfie light to illuminate yourself.
These little lights are definitely taken for granted. I remember when I had just a simple iPod Touch with the new front camera. There was no flash or extra lighting, so I had to be in a room with perfect lighting. Unfortunately, naturally good lighting is hard to find (especially indoors), so most of my selfies weren’t very good.
Eventually, front flash came into existence but taking pictures with it always made me look very unflattering. The flash always caught me off guard, so I ended up blinking and scrunching up my face. I can’t think of a single time when I took a picture with front flash and thought, “Wow, I look great in this!” A little light that attached to my phone would have solved all my selfie problems.
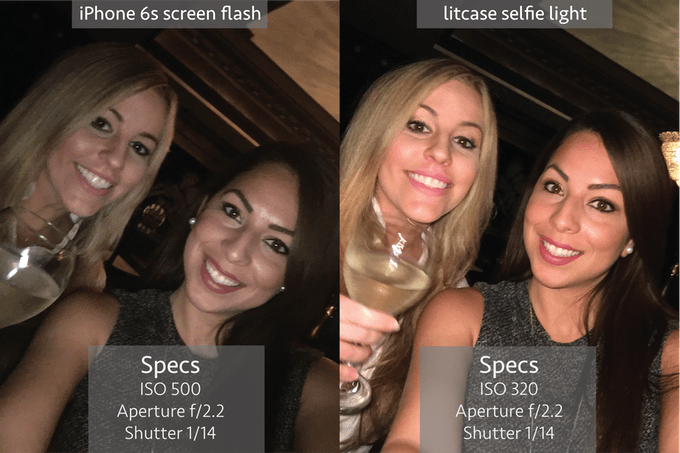
Basically, these lights are used to highlight all your best features and illuminate your picture. For example, in the picture above, you can see how the light makes the selfie brighter and a little sharper. Your camera can focus on the illuminated subject with the light, rather than being blurry and out of focus because you are too dim in the frame.
Unlike normal flash, these lights stay on as long as you want. There is no quick burst of light to surprise you or cause temporary blindness. A selfie light stays so you can look your best without squinting at a flash. You don’t have to worry about editing brightness or sharpness into your pictures because that’s already taken care of.
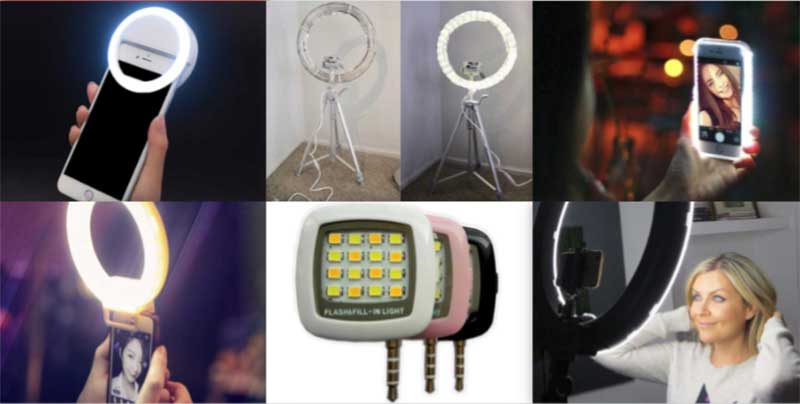
There are a few different types of selfie lights, so let’s talk about them first. Later, we will go in-depth on ring lights.
Phone Case with Built-in Light
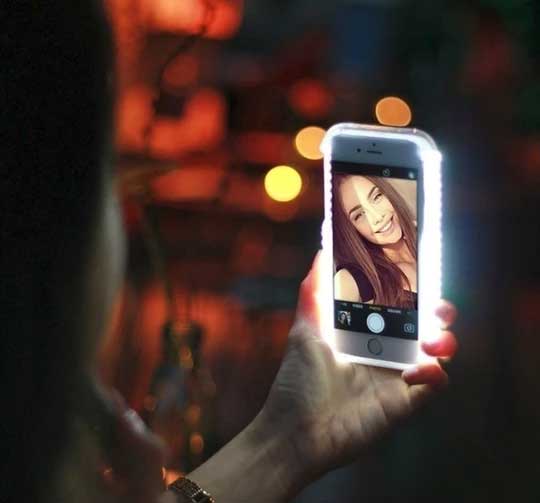
If you want to always have a selfie light with you, consider buying a phone case with a built-in light. The cases are a little more expensive than your average phone case, but it is definitely worth it considering you are getting two things for the price of one.
Remember that the other selfie lights are a bit more versatile. This type of case may not be built for certain phones, and it’s with you all the time. Although this is great because you will always have access to selfie lighting, it may not be the most protective case for your phone, especially if you drop your phone a lot.
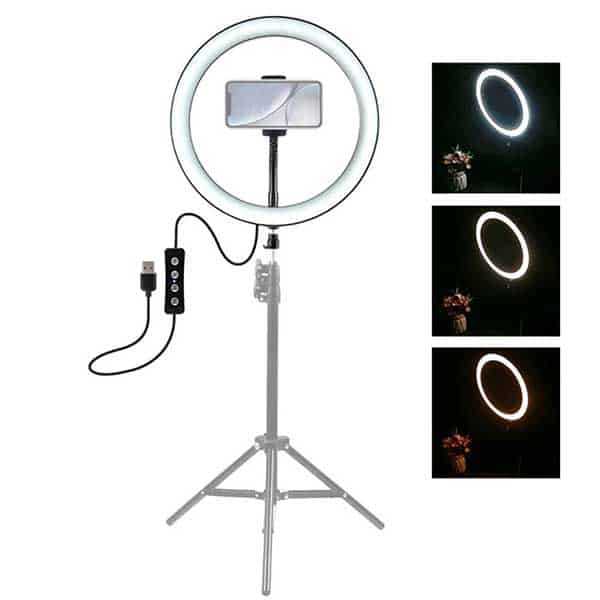
Standing Ring Light

These lights are great for vlogging as well as selfies. If you want that quality selfie lighting for a vlog you want to shoot, consider buying this! Alternatively, you can make lights like this by yourself. In a later section, you can to find out how to make one of these with a few simple materials.
If you have any plans on becoming a vlogger, this is the first piece of equipment that you should consider buying. Most popular makeup vloggers have a ring light and use a set-up like the one pictured above, but they are good for just about any type of vlogging where you don’t have to walk around too much. A ring light like this will make you feel like a selfie professional, even if your audience is just friends on Instagram.
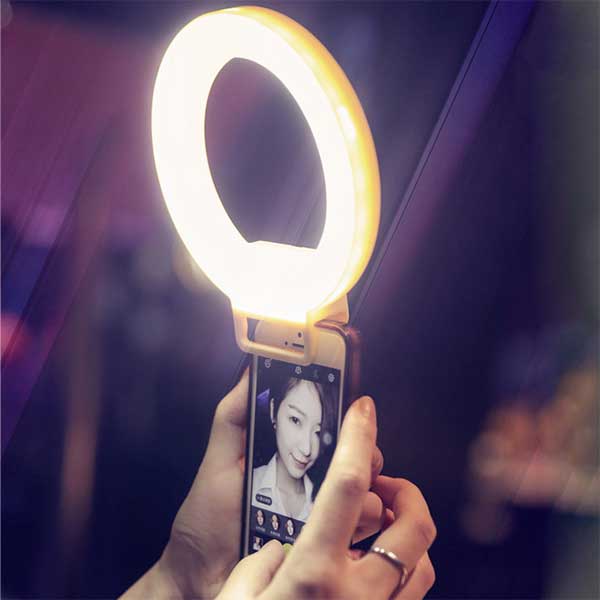
Clip-on Ring Light
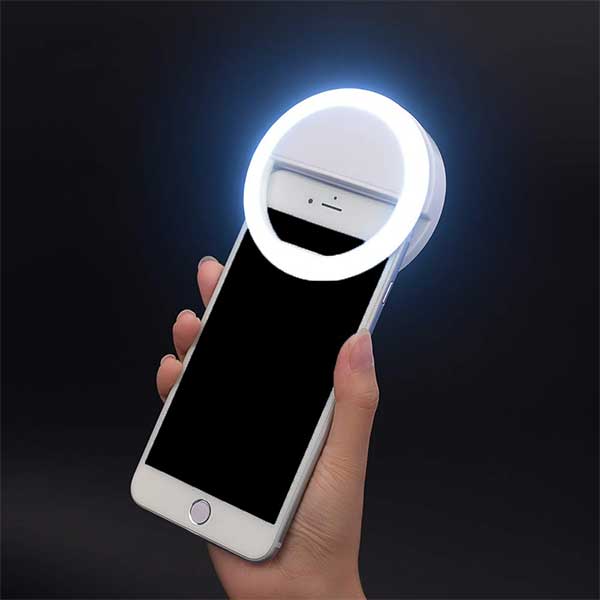
This is a smaller version of the larger selfie ring light that attaches right to your phone. This is the best option when it comes to selfie lights and is essential if you are planning on taking selfies to share with social media. Read the next section to learn more about these lights, and how to use them to their fullest potential.
Square Selfie Light
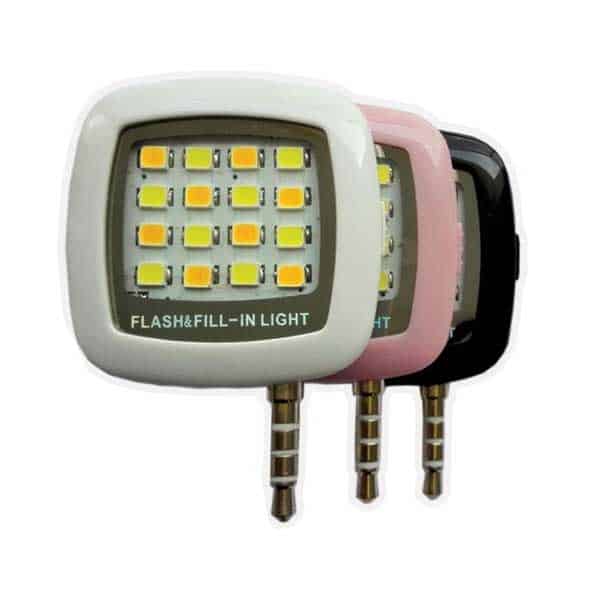
This is the type of light displayed earlier in this section. It is a simple little square that plugs in directly to your headphone jack. While these were popular at first, they are losing that popularity with iPhones that now no longer have headphone jacks. It is not really ideal to plug this light into an iPhone adapter, and then plug that into your phone while the light dangles around. Who knew we would live in a world where phones don’t have built-in headphone jacks?
What is a Selfie Ring Light and what does it do?
Now that you know the different types of selfie lights, let’s talk a bit more about selfie ring lights! This is definitely the best option for you if you want to take better selfies at home or on the go.
The shape of the light helps with the quality of pictures taken; it isn’t just a shape that was randomly picked. The ring gives off light in a circle around your face, rather than one intense beam of light pointed directly at you. The light is also spread out, making it a bit softer than light from the square selfie lights pictured in a previous section.
We’ve already talked about some benefits of these ring lights, but let’s recap and talk about a few more. The most notable benefit is a pleasant eye-catch from the light. This means that the reflection of the light in your eye won’t display a weird shape that doesn’t seem to fit. There will be no harsh red-eye effect or glare; the light gives off a circle reflection that matches up with the shape of your pupil.
This also delivers a soft light to the subject. Because the light is spread in a ring with no direct point aimed at you, there is no harshness to it. The light is distributed evenly around you, creating a natural-looking light spread across your face. Natural and even lighting is super important for any selfie you take; we’ve all attempted to take a selfie in harsh fluorescent lighting only to realize it made you look completely different.
Most of the time when you take a selfie, you want to look great. Sometimes, the lighting around you can bring out features you would rather not highlight. Fortunately, a ring light creates a flattering close-up of you. Your skin will appear a little smoother, with no small shadows.
Lastly, any selfies that you take will be clearer. A ring light helps focus on making the subject clear, so your image will be sharper. Often times, pictures that are dim appear blurry. With a ring light, you can totally eliminate this problem.
How to Use a Selfie Light
Using a ring light is pretty straightforward, but let’s go over some tips to take the best selfie.
To use a small ring light, all you have to do is clip it to your phone. Most ring lights don’t plug into your phone; you just have to charge it. Remember that it still is quite small, so the range for the light is a bit limited. That’s all there is to it! It’s not hard to use; all you have to do is charge it and turn it on.
Larger ring lights are a bit more complex than their smaller counterparts. The first thing to do when using a large one is to decide where to place it. Are you going to use a standing ring or one that sits on the surface in front of you? Once you decide this, place the light facing directly towards you. You can place it at different angles to see the different effects, but if you are looking for a traditional selfie with normal lighting, placing it in front of you is the way to go.
Take a look at the picture above. When you use a large, standing ring light, your phone (or camera) will sit right in the center, so you can look directly into the ring. It won’t appear like you are looking into a different direction, and since the light is in a ring, you won’t have to look directly at it and hurt your eyes.
While the smaller lights don’t need to be plugged in, most of the larger ones do. Be sure that you are near an outlet when setting up. This shouldn’t be a problem, but if you want to take selfies on the go then the smaller, clip-on option is a better fit for you.
Overall, these lights are simple to use and understand. Larger ring lights can sometimes be a bit expensive, but fortunately, you can make one at home! Read below to find out what you need to make a large ring light.
DIY Selfie Ring Light
Making your own DIY light may seem difficult at first, but it’s not! There are plenty of online tutorials to make them. The photo above is from Youtuber Sassygirl. Here are the supplies that she used;
- Wreath
- Zip ties
- LED rope light
- Foil
- Tape
- Folder
- Scissors
- Tripod
All of these supplies are easy to get as well. Wreaths are sold at arts and craft stores. Most people buy them to make their own holiday wreaths, but they work just as well for your DIY ring light.
There are other ways to make your own right light, so if this one doesn’t interest you, feel free to search for other options. Plenty of YouTubers have tutorial videos, and there are several websites that take you through the steps as well. Don’t feel like you have to settle for a store-bought light. Try making your own and customizing it as much as you want!
Final Thoughts
Overall, a ring light is the way to go. With one of these lights, you can step up your selfie game. The bigger lights are great for selfies as well as vlogging too. It is completely up to you on what type of selfie light you want, and there are plenty of options out there for you to choose from.
Get out there and start taking more selfies!